When you are using any product it’s very important to know how to use that product most efficiently to make most out of it. So here is everything you need to know about Vdocipher Dashboard.
This is a screenshot + text detailed explanation, while video tutorials can be checked out at our video and doc support tutorial compilation. Video tutorial to each feature is also included in link to the headings below.
How to upload/import a video-
Once you have created your account on Vdocipher first thing you do is add a file on the Vdocipher dashboard. There are two methods of adding a file to the dashboard
1- Upload
Once you have logged in to the Vdocipher dashboard you will be able to see the upload tab. When you will click on the tab you will be able to choose a file from your desktop and upload it to the dashboard.
2- Import–
If you do not have videos on your desktop you can import the videos to the Vdocipher Dashboard. There are multiple options to import a video-
Import from Google Drive
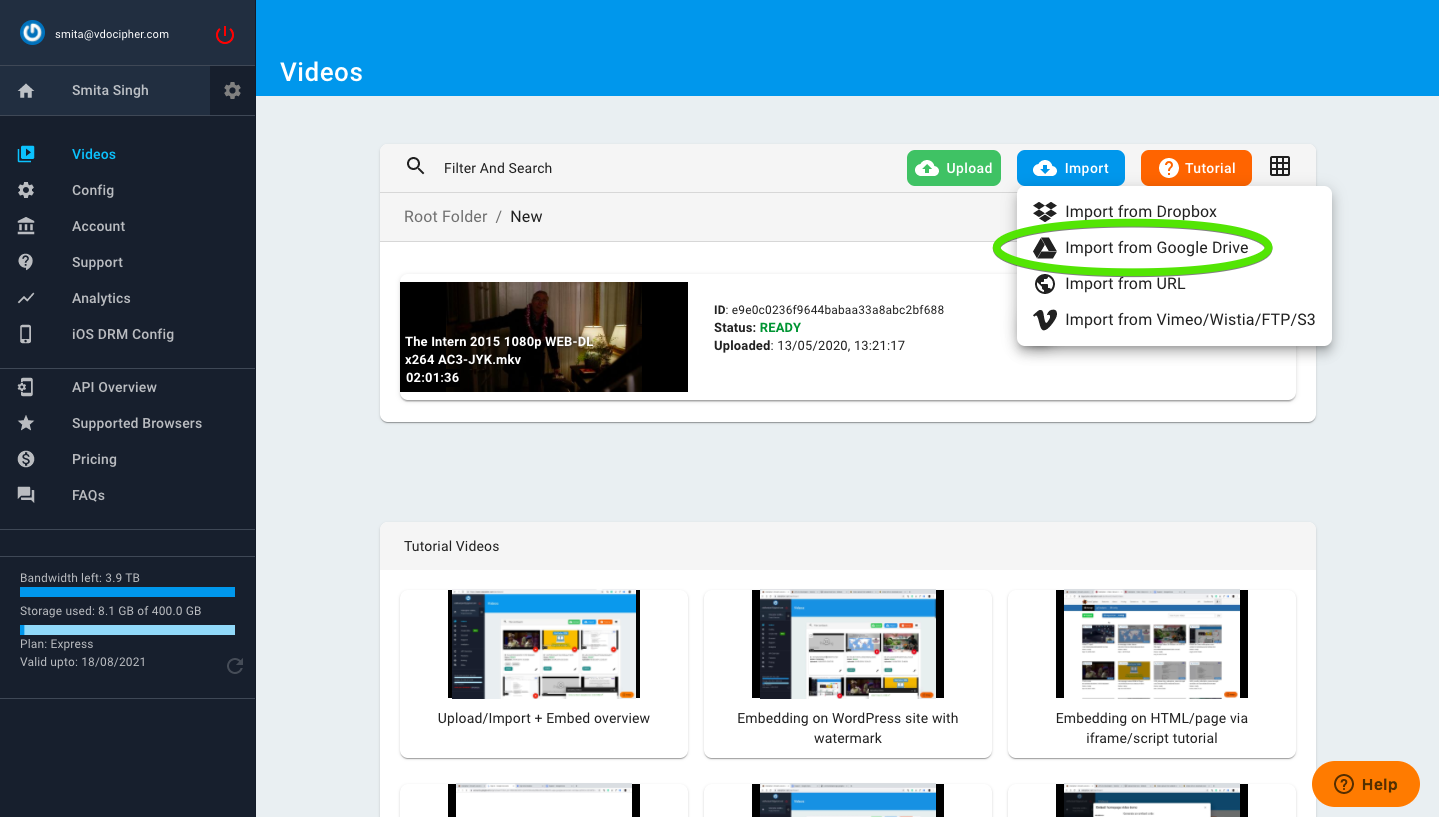
Right next to the upload option there is an option of import. Once you click on the import you will be able to various options. From there you can choose the option of import from google drive. Once you will click on the option you will be redirected to your drive and can choose your video from there.
Import From Vimeo Pro or Higher Account
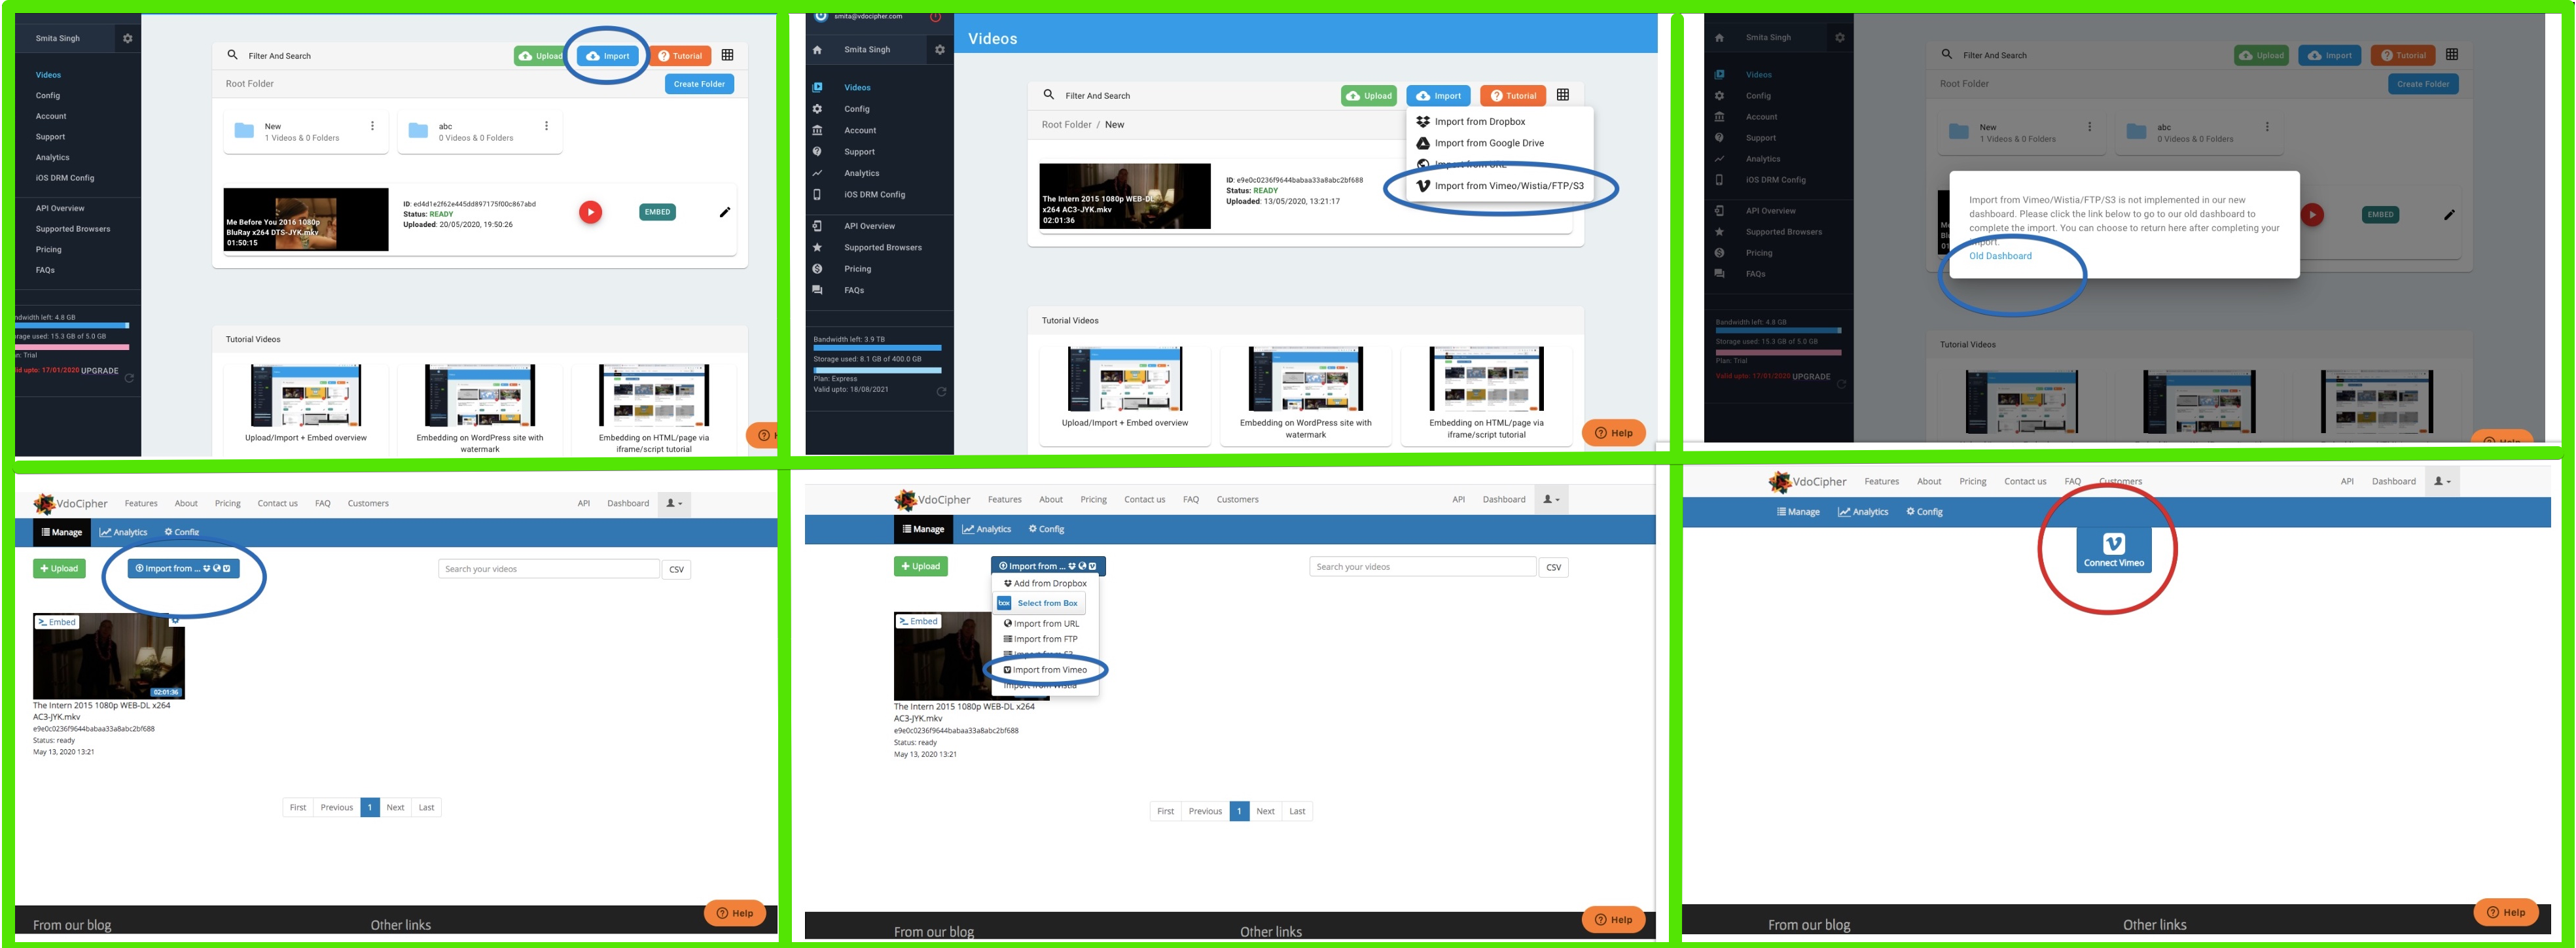
If you were a previous customer of Vimeo pro or higher account (business, premium), and you want to import your Vimeo account videos to VdoCipher videos; you can click on Import from Vimeo option. Once you will click on the option it will redirect you to our legacy dashboard. In the legacy dashboard, you will be able to see the import option. Once you click on it you will be able to see various options in the dropdown menu from where you can choose import from Vimeo option. It will redirect you to your Vimeo account from where you can directly import the files you want to add to the Vdocipher dashboard.
Please note that kindly do not use this legacy dashboard for any other purposes than import/upload. Embedding, video settings, API docs are to be accessed from the main VdoCipher dashboard.
Import from Dropbox
If you want to import a video from dropbox you can also do that. All you have to do is click on the import option and select import from the dropbox option. You will be redirected to your dropbox account. All you have to do is fill the details of your dropbox account and select the video you want to import from there.
Import from Video Url or Server
If you want to import a video from a video URL or some server like amazon AWS server you can also do that. This process is similar to the process of importing a video from Vimeo. You need to click on the import option then select the option of import from Vimeo/Wistia/S3. Once you will click on this option a tab will pop up and it will redirect you to our old dashboard. Here you can see the option of “import from”, once you will click on it you will see a dropdown menu where you will see the option of import from S3. Once you will select this option it will take you to the S3 tool bucket where you have to fill the details and you can select the video you want to import from your server.
How to edit video settings
Once you have uploaded the video to the Vdocipher dashboard you can edit it according to your requirement. These are some options we provide you in Vdocipher dashboard-
1- Basic Settings
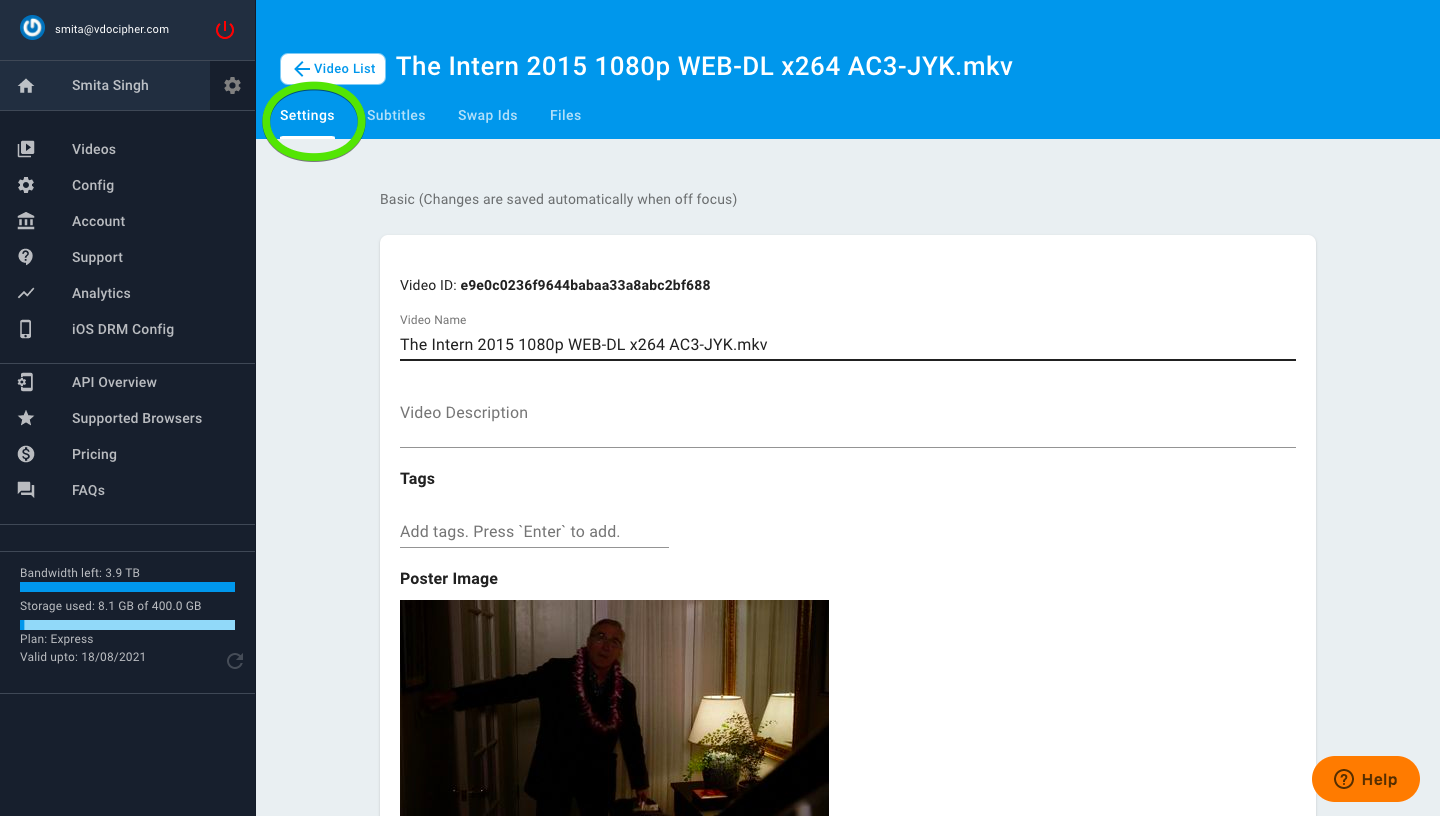
Once you have uploaded the video you will be able to see the edit option on the right corner of the video. Once you will click on it, it will redirect you to the basic editing options named settings. From here you can add video description, tags, change the poster image of the video.
2- Subtitles–
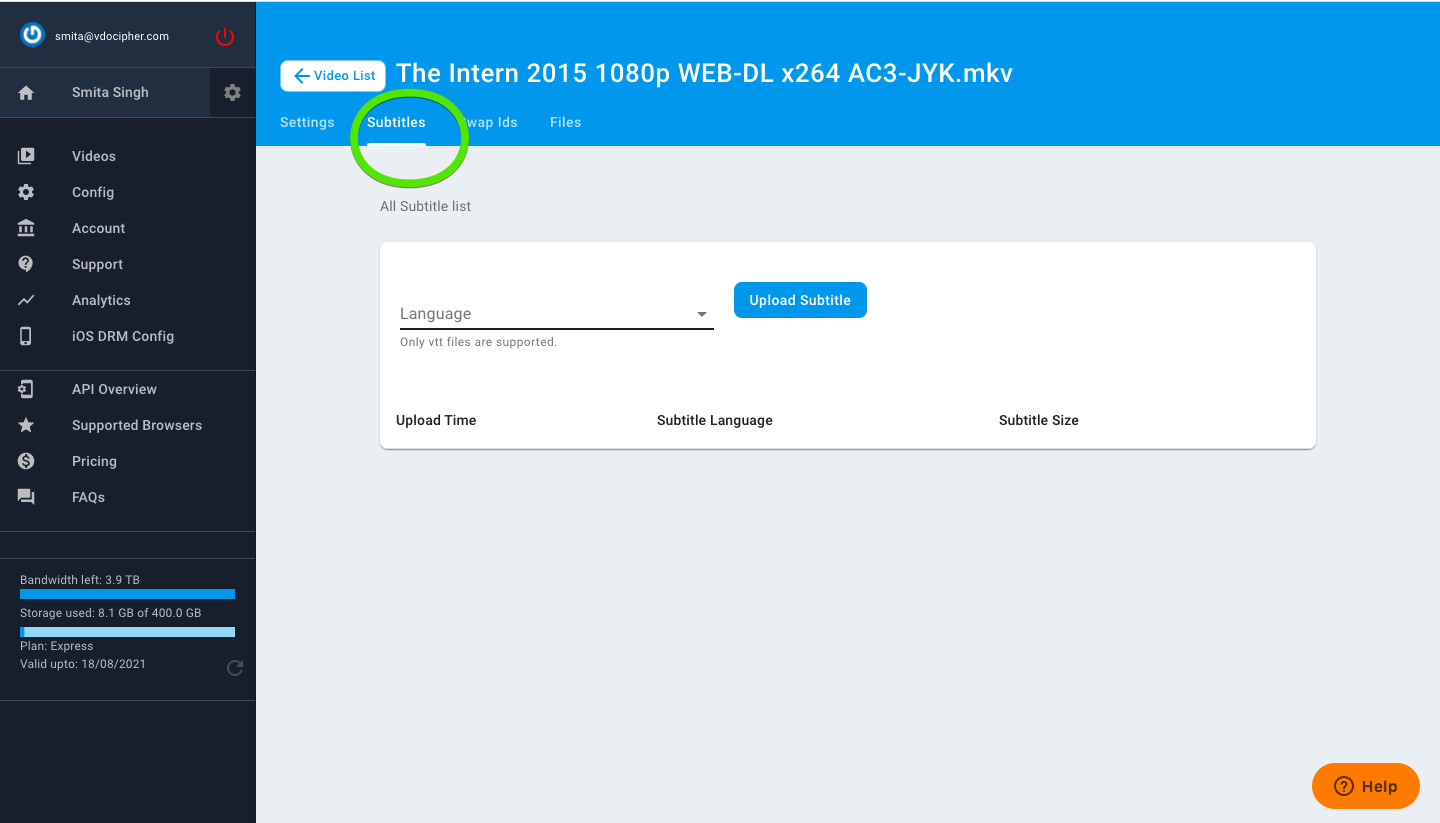
Right next to the settings options you will be able to see the subtitles option. Once you click on it you will be able to see the upload subtitles option. From here you can choose your language and upload your subtitles file. We support multiple language subtitles.
3- Replace a video
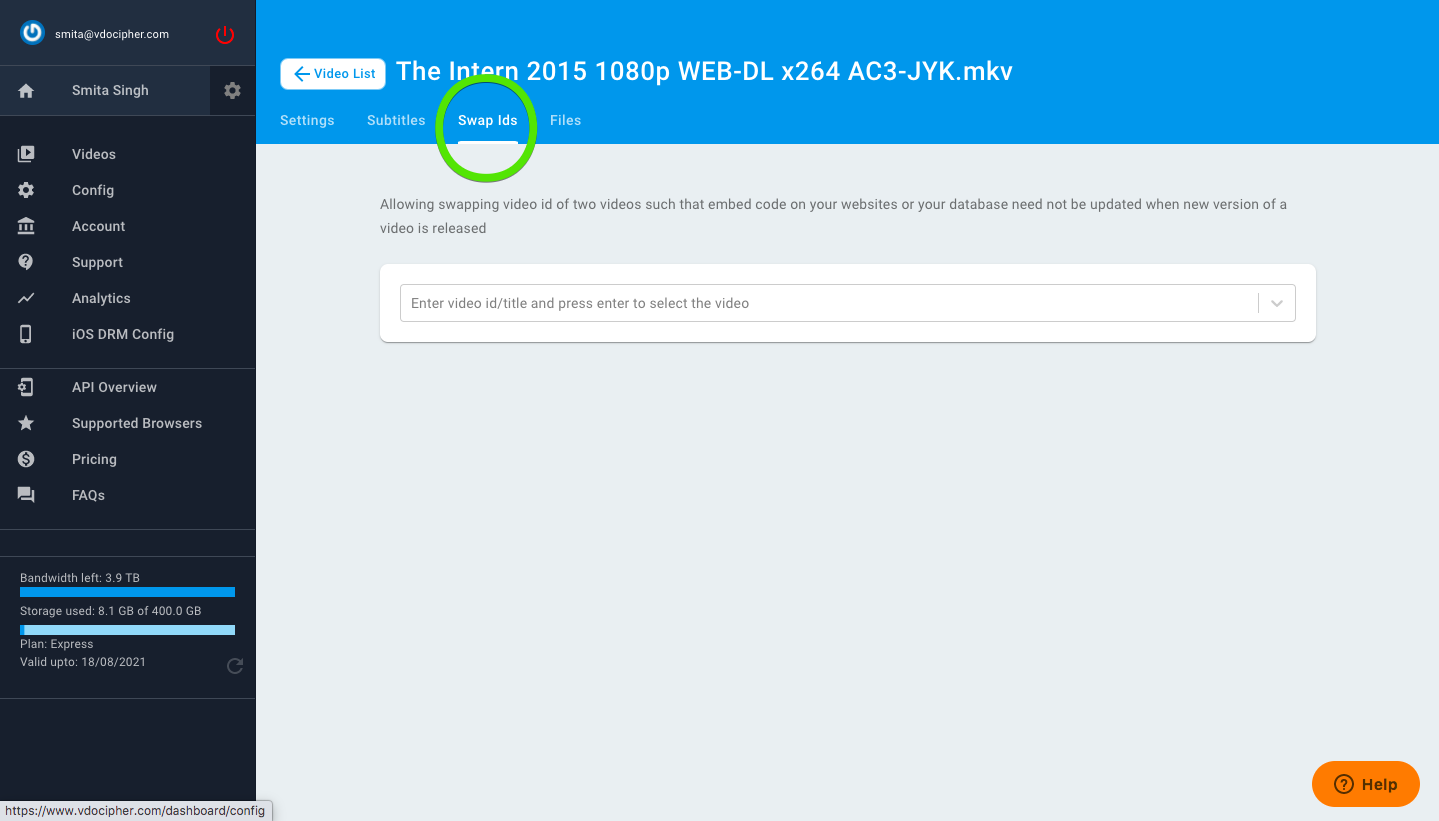
If you want to replace an old video with a new video you can use this feature. All you have to do is upload a new video then copy the video id of that video and click on the edit option of the video you want it to replace with this video. Then go to the swap ids option and paste the video id of the new video. This way without disturbing you embedding you can replace a new video with an old video.
4- Video File details
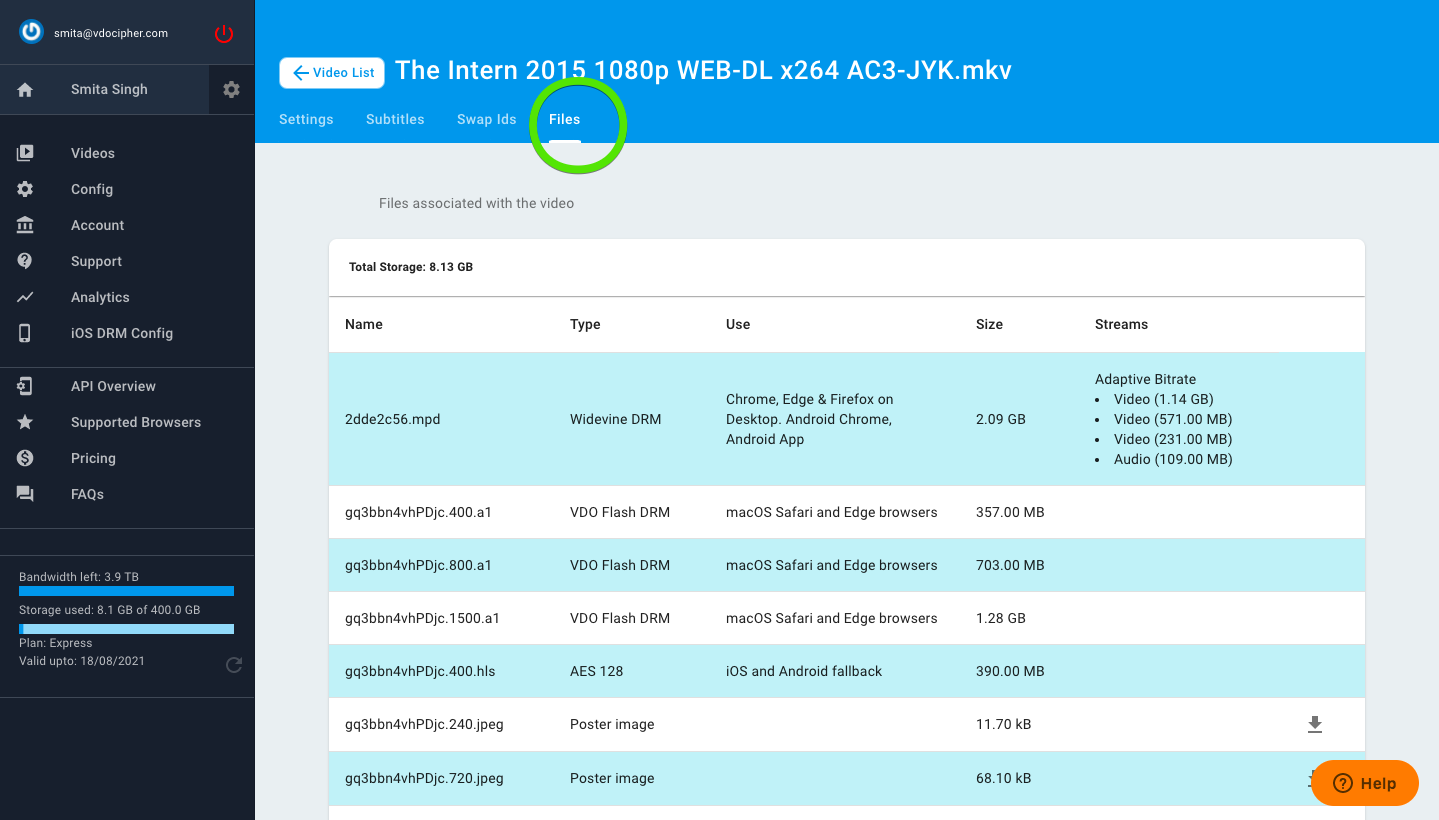
If you want to know all the details of the video like quality, storage, etc, all you need to do is go the edit option and then click on the files option. You will be able to see the complete details of the video.
5- Delete a video
If you want to delete a video then you have to click on the edit option of the video then scroll down to the page. There you will be able to see the delete option. You need to click on that option and then confirm your action and you will be able to delete the video.
How to embed a video
Video embedding is the most important process you do with the Vdocipher dashboard. There are various embedding options available according to your requirement. These are the methods you can use for video embedding-
1- Quick Embed
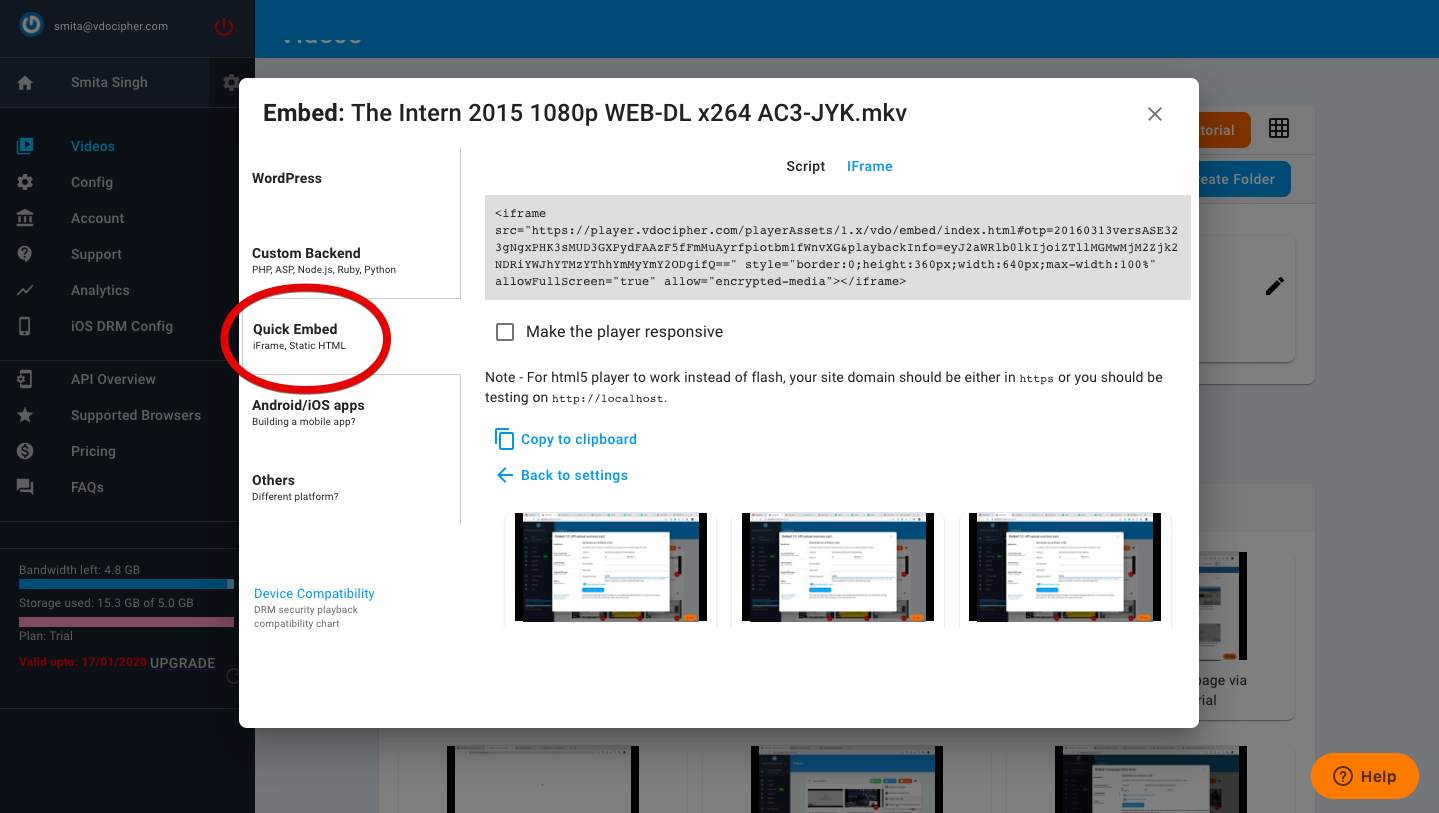
If you are using a third party LMS and want to embed your videos on that portal then this is the method you should use for embedding. You need to click on the embedding option given next to the video and then select the quick embed option. After that, you need to click on the generate code and then copy the iframe. You can embed this iframe with your LMS and your videos will be available on your portal.
2- Embedding with WordPress
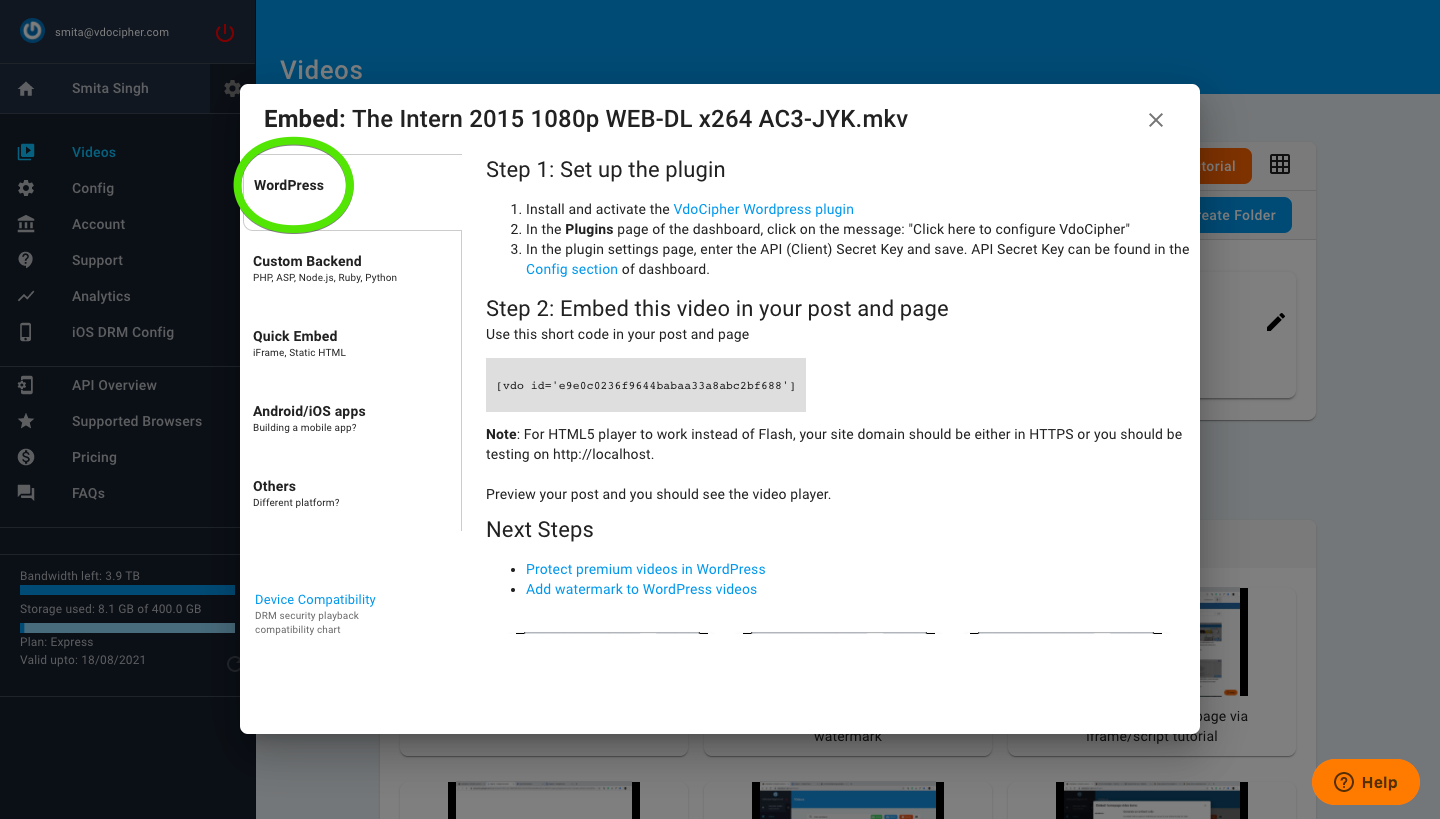
Similarly for WordPress, you need to go the embed option and select the WordPress option. From here you can download the Vdocipher plugin for your WordPress website. In this section, you will also find all the WordPress embedding related details.
3- Embedding via API
If you have a custom website and you want to integrate Vdocipher with your backend you can also do that. All you have to do is go the embed option and select the custom backend option. Here you will find all the details you will need regarding the integration.
4- Embedding with Android/iOS
If you want to integrate with your android app or iOS app you can also do that. Go to the embed option and the select android/iOS apps option. Here you will all the documentation regarding the app integration.
If you want to integrate Vdocipher with your moodle website then a moodle filter plugin to add download-protected videos from Vdocipher inside any moodle content. This replaces shortcodes with the embedded video player. You shall get an API key and ids for each video from your Vdocipher dashboard. This can be used to embed your videos inside any moodle content such as a page or an activity.
How to manage Vdocipher Account
As an admin you need to know how to manage your account, what are the things you should be aware of and what are the precautions you should take. Here are some important account configurations you should know-
1- API Key Generation–
To use Vdocipher on with your website or app, your server program needs to communicate with the Vdocipher server to allow a video to playback or upload video or get a list of videos matching a search. Your API keys are as important as your password.
To generate an API key you need to go the configuration section and there you will see the option generate an API key.
2- Multiple Users addition–
As you can not manage everything and you need to add other members on different roles you can also do that. These are some roles on which you can add your subordinates-
- OTP Creator is specially made to be used on your server where you will generate temporary tokens so that your logged-in users can watch their videos.
- Uploader permission allows uploading videos to your Vdocipher account.
- Editor is the highest permission and allows all video management and configuration changes other than adding or removing team members.
To add them you need to go to the configuration section and then from the top, you need to select the option of users. Here you can add the email ids and names of the users you want to add to the Vdocipher dashboard.
3- Webhook Creation
Webhooks typically are used to connect two different applications. When an event happens on the trigger application, it serializes data about that event and sends it to a webhook URL from the action application—the one you want to do something based on the data from the first application. To create a webhook in the Vdocipher dashboard you need to configuration option then select the webhook option from the top. Now you can paste the URL you want to add and create the webhook.
4- Account level URL restriction and Country restriction
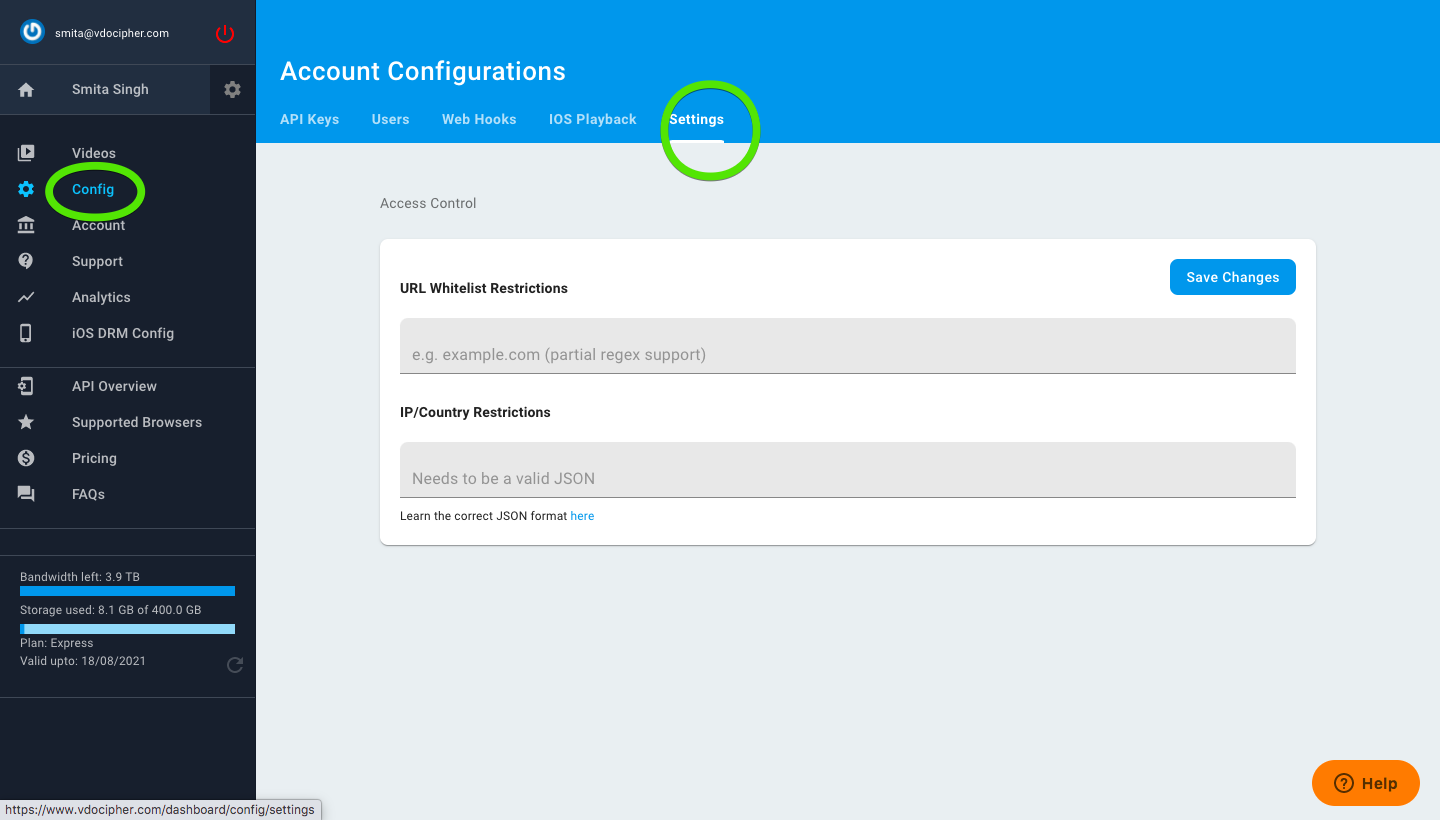
If you want to add the countries, Ips, URLs you want to whitelist you can add them here. All you need to do is go to the configuration section and select the settings option from the top. Here you can add these details. You will also find the format you need to use to add these details here.
How to check the analytics
Earlier I have told you how to check the storage of a particular video. Here you can check the bandwidth consumed by your users. These are the two options to check your bandwidth-
1- Daily bandwidth Usage
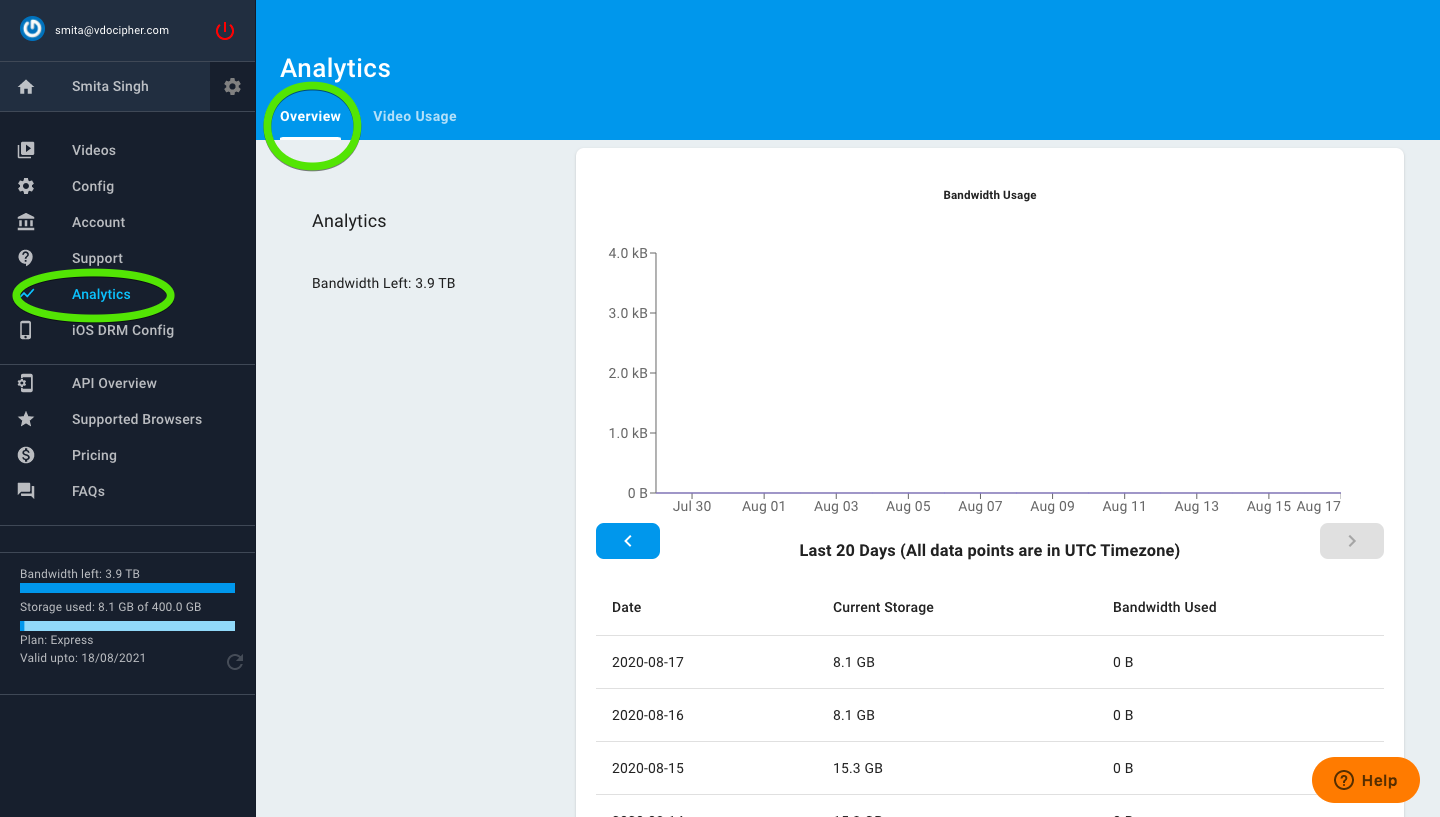
In this option, you can check the consumed bandwidth of the last 20 days. To go to this option you need to select the analytics option from the left and you will be able to see the bandwidth report.
2- Custom bandwidth Report
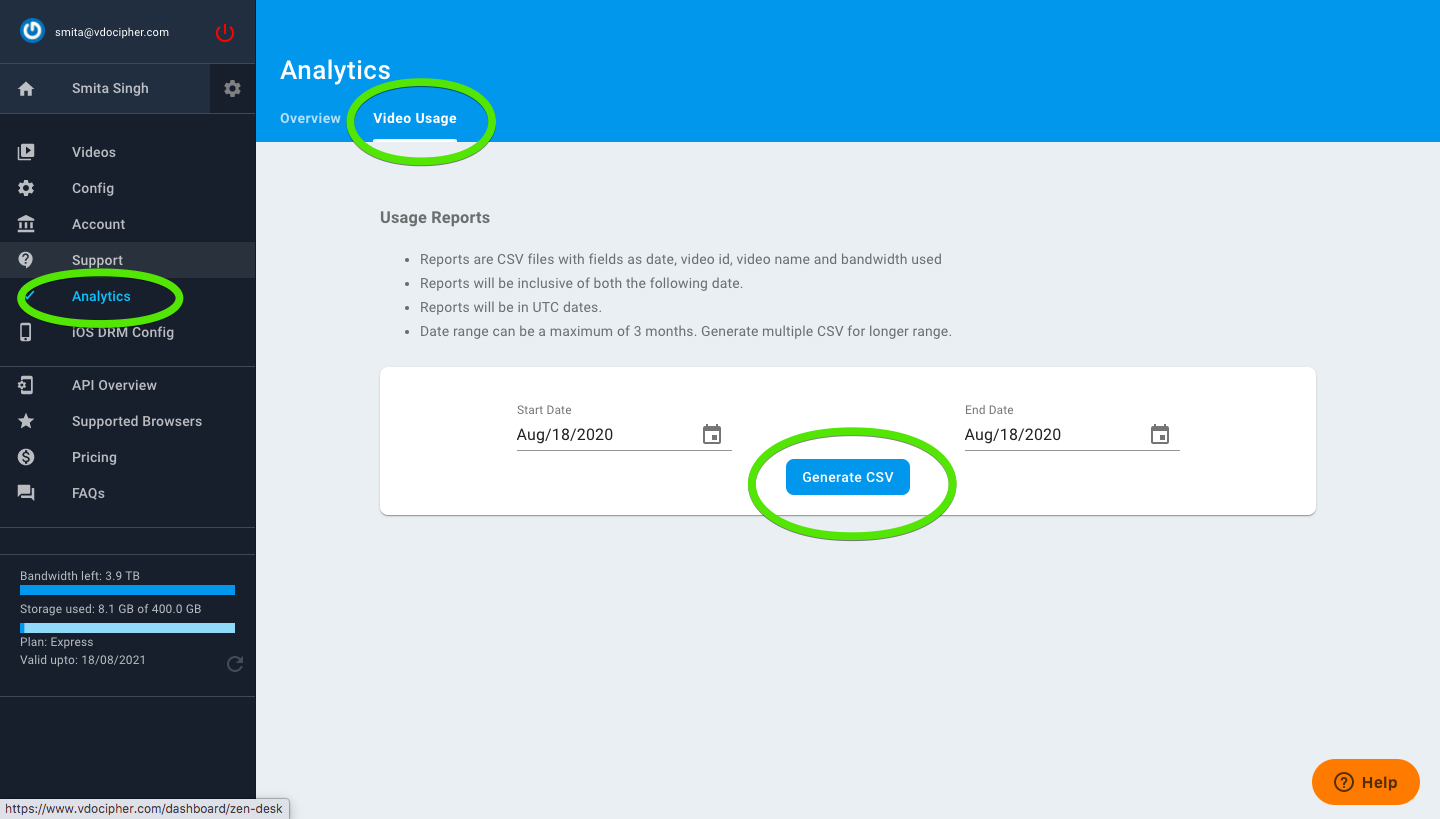
If you want to check the bandwidth from a particular date or between a particular time period you can also do that. Go to the analytics section then select the video usage option from the top. Now you can enter the dates and export the bandwidth data in the CSV format.
How to upgrade your account?
1- Buy a plan
If you want to purchase a plan from the Vdocipher dashboard you can also do that. You need to go to the account section and you will be able to see different plans. You can choose a plan from there and can make the payment. As we do not save any card details so you need not worry about any automated payments.
2- Buy extra storage or bandwidth
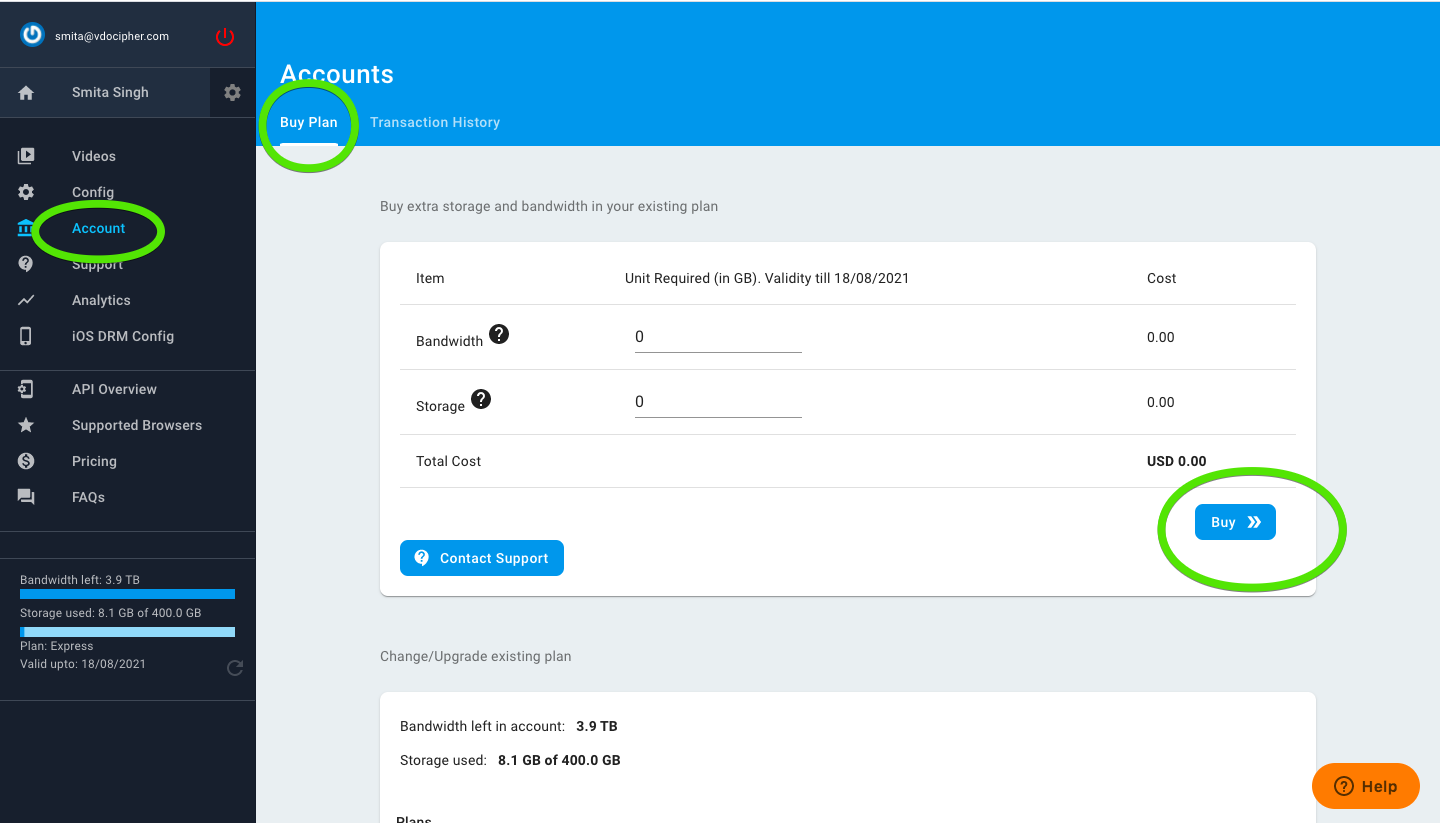
If you already have a plan and you want to purchase extra bandwidth or storage you can also do that. All you need to do is go to the account section and select the amount of bandwidth and storage you want to purchase and you can make the payment.
How to manage your videos( Folder management)
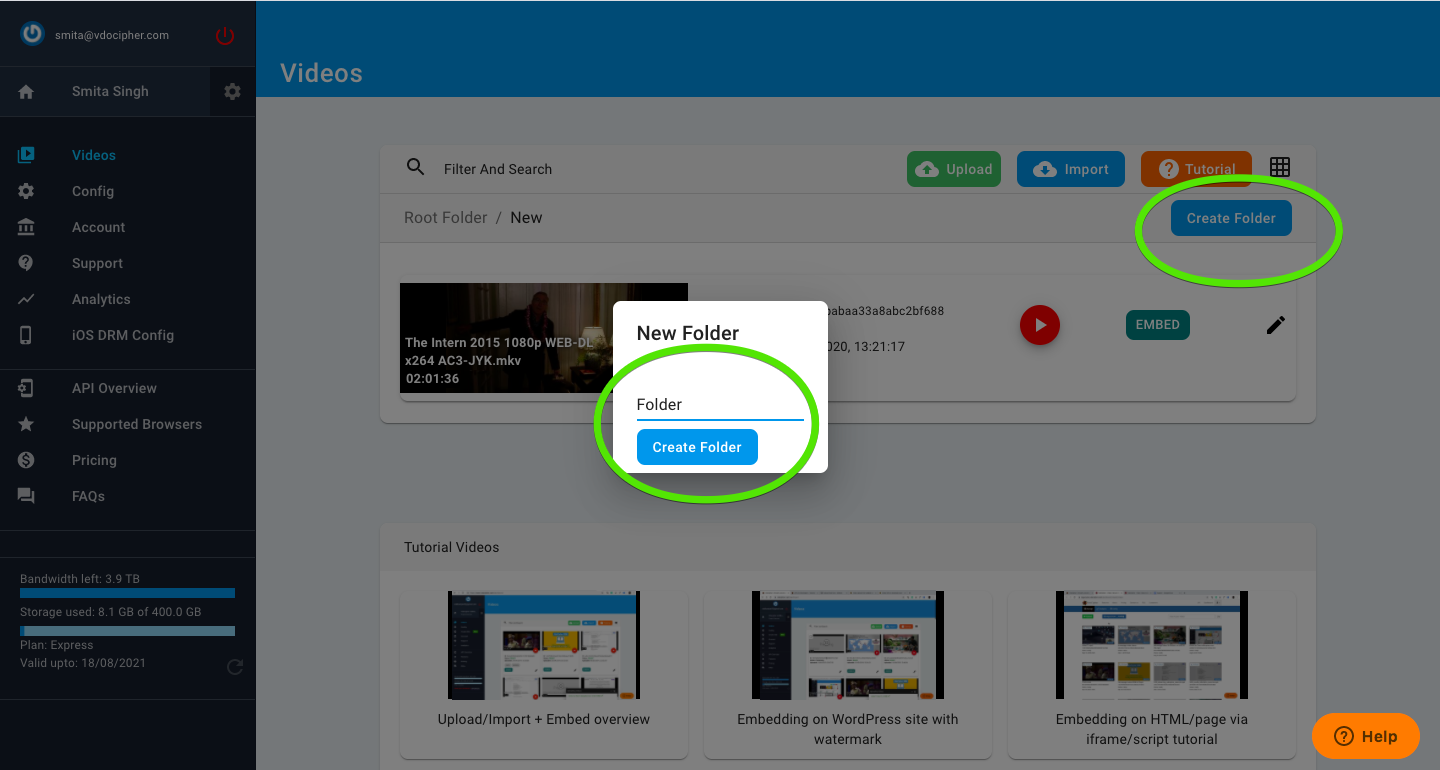
You can create folders in the Vdocipher dashboard to manage your videos. You can also create subfolders inside the folders which will help you to manage your content. Folders are only to manage your files on the Vdocipher dashboard. They will not be visible on your website or app in the same format. Also once you delete a folder without deleting its files first, then the files will be available in the root folders. If you want to delete files and the folder both then you have to delete the files first then you can delete the folder.
These are all the important features of the Vdocipher dashboard. You will also find support tutorials, API overview, pricing page, and FAQs in the sidebar so if you need any help you can use them as well.
This was the complete guide for the Vdocipher dashboard. If you need any other information then you can always reach us at support@vdocipher.com.
Supercharge Your Business with Videos
At VdoCipher we maintain the strongest content protection for videos. We also deliver the best viewer experience with brand friendly customisations. We'd love to hear from you, and help boost your video streaming business.


Digital Marketing | Writing
I read therefore I write.

