VdoCipher serves education businesses and individuals who are looking to sell their premium courses on website/app in most secure and smooth manner. A considerable portion of users are on WordPress. They tend to use a bundle of Vdocipher plugin , some wordpress LMS plugin, LMS theme, Membership & payment plugins to complete their course video website. We thought of providing a step by step guide to do this with wordpress. Please note that this is not endorsement for any particular plugin/theme, we used them because they were decently popular and solved the purpose. Alternative option to them are also listed.
This is a text + image guide, and soon we are going to release a video on the same steps, to get clear visual perspective of things. Here are the classification points –
- Introduction
- Local WordPress setup with MAMP & XAMPP
- Installing Woocommerce (E-commerce plugin)
- Installing Sensei (WordPress course plugin)
- Alternate to Sensei (other WordPress LMS plugins)
- LMS theme for Course template and homepage
- Installing VdoCipher streaming plugin
- Theme basics & extra plugins for installation
- Editing Menus & Widgets
- Edit page content & designs through LMS & wordpress editor
- Edit images, font, text in homepage template & other pages
- Buddha Panel for more theme settings
- Sensei hierarchy explained
- Adding courses & classes
- How to add Videos & text to courses
- How to manage learners, teachers
- Integrating Sensei with Woocommerce for pricing & Detailed Sensei Settings
- Integrating payment gateway like Paypal, Stripe
- How it looks for a student
- Support Links
- Free VdoCipher Trial
1. Introduction
Course website creation in WordPress is about choosing a combination of appropriate themes ,plugins and being able to modify their settings and customisation for best of your need. The blog aims to provide ready to go options for each of such settings of plugin and theme. A step by step approach ensures that you don’t miss any essential point from the workflow for teacher and student.
2. Local WordPress setup with MAMP
A finished website will be eventually live on servers/CDN. Based on scale of usage, the servers can be from dedicated hosting, shared hosting, international cloud providers like AWS, Google etc. For this article, we provide some details to how to setup site on your computer’s localhost to be able to build the whole website once for yourself. Hosting can then be handled by the server tech guys.
The following article is a detailed guide on setting up MAMP on Mac computers for local wordpress setup. It has all the images and detailed steps to make it easier for you. While for windows user, the article by wpmudev will be useful.
Here are the two important links to download wordpress and download MAMP.
3. Installing Woocommerce (E-commerce Plugin)
Woocommerce is the most popular plugin for selling things. It includes variety of customisations around membership and payment to help you do so. WooCommerce also accepts to link WooCommerce to eBay, Etsy, Amazon or other different multiple channels. Woocommerce download
4. Installing Sensei (WordPress LMS Plugin)
Sensei is one of the popular wordpress LMS plugins which handles course, lesson creation. It works with woo-commerce at the backend. It is a one time paid plugin and the value it provides in ease and detail of use, it is affordable.
5. Alternate to Sensei for WordPress LMS
Sensei is not the only good plugin for wordpress LMS. Some other good options are LearnDash, LifterLMS & LearnPress.
6. LMS wordpress theme for Homepage & design templates
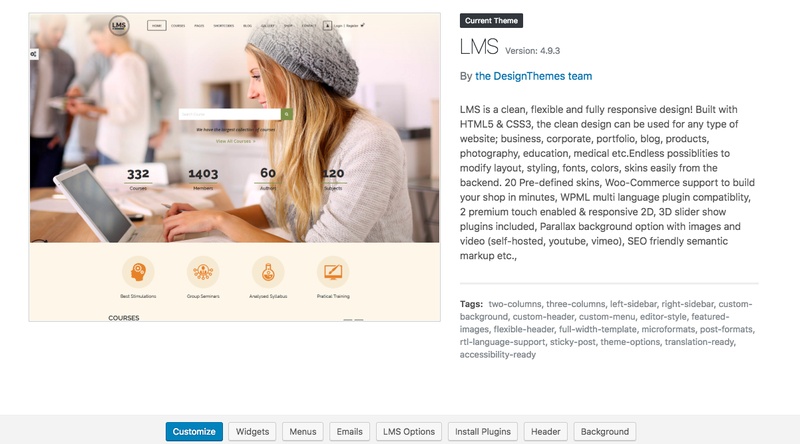
A theme is necessary to ensure good aesthetics for the wordpress course website. WPLMS is a popular on themeforest. Other good theme is LMS theme. More themes can be looked at envanto markeplace. Please ensure that theme you are looking for is compatible with your LMS. The best thing about LMS theme is that support is very good. For most queries, there is already a support page for the relevant content, or you can post new.
Common Missing style sheet error – A common error while installing themes with wordpress is missing style sheet. It can be solved by following the procedure explained here.
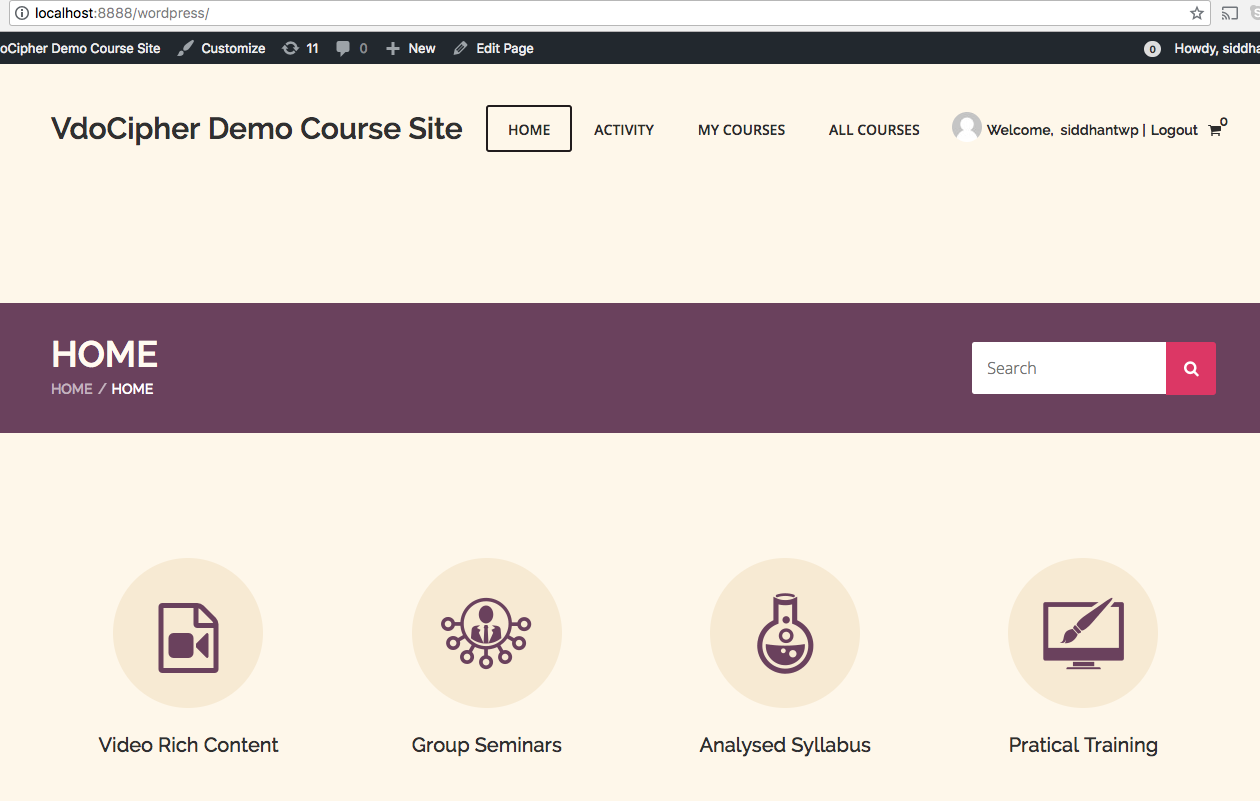
Installing template homepage – Go to Theme settings > LMS option >, Importer > Demo > Requires extra plugins
7. Installing VdoCipher WordPress Plugin
Video courses are the major part of any online education business. VdoCipher encryption and viewer specific watermarking ensures that no downloader or hack can download/pirate your videos. The VdoCipher’s WordPress video hosting plugin includes server to player solution with DRM security solution. The VdoCipher plugin can be downloaded here.
8. Theme Basics & Extra Plugins required
The LMS theme comes with a template homepage and pre-defined stock fonts , images and other detailed design. In the following steps, we will explain how to edit each of them.
Installing template homepage & Extra plugins- Go to Theme settings > LMS option >, Importer > Demo > Requires extra plugins
While you try to install the template homepage, it will ask you for allowing to download and install a set of other plugins. These extra plugins are basically to manage media and design elements. You can choose to proceed with all free such plugins that are required. If you are looking to do a homepage from scratch, then it is not needed.
9. Edit Menu & Widget
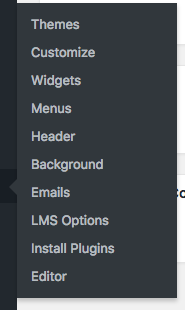
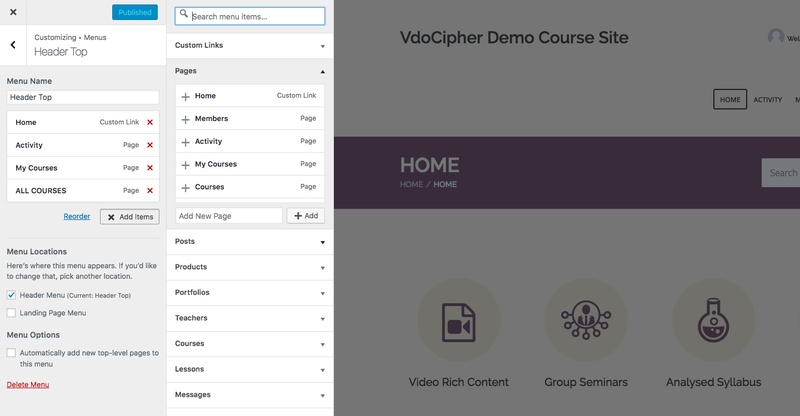
On the right side in wordpress panel, there is an option to customise appearance. Appearance has sections like ‘theme’ , ‘menu’, ‘widget’. Menus and widgets can be both edited from either the theme section or directly the menu/widget section. It is somewhat easier to visualise and edit after going through the theme section. So, select the theme section and edit the menu and widget from there. These sections look like screenshots attached here.
Step1.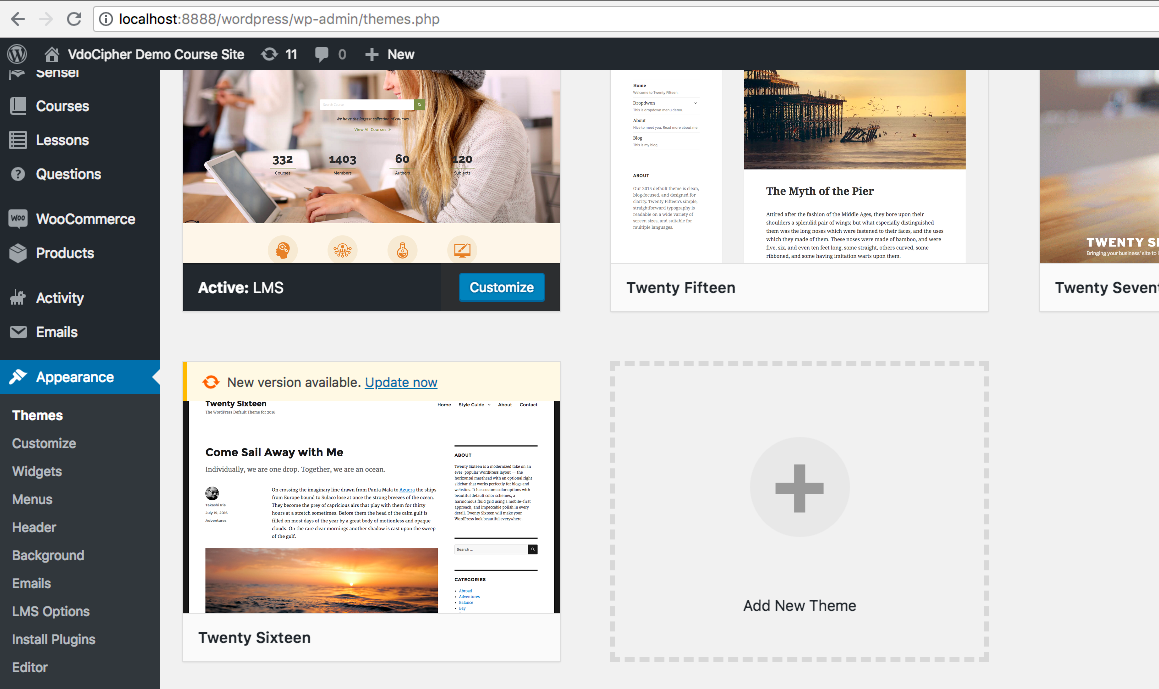 Step2.
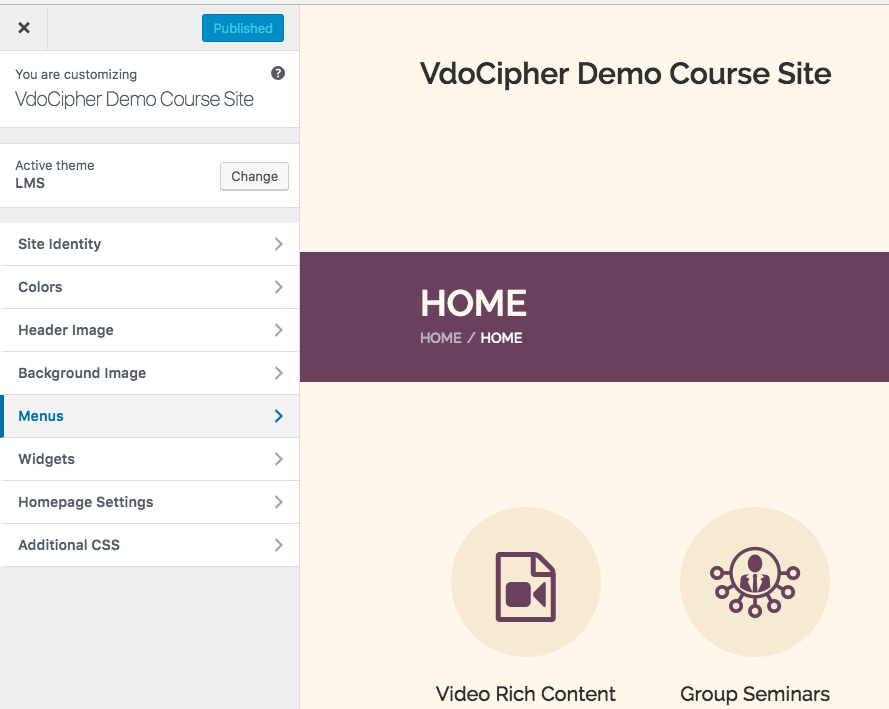
As you can see in menu, there are various options to add – You can add normal buttons with links to any relevant pages (e.g pricing), things from your LMS plugin (like courses, products, lessons, teachers etc). I have added ‘My courses’ and ‘All courses’ in menu as it should be relevant for all the students. You can add more things like Pricing, Contact us etc.
10. Edit page content & design through LMS & WordPress editor
- Go to WordPress admin home panel. On left most widget, there is an option to add pages.
- Click on adding new page. If you have correctly installed LMS theme, it will show a custom LMS based editor.
- An option to switch to wordpress editor is always there. Editing in both editors simultaneously can mess up with design many times. It is good to use any single editor for most of the operations.
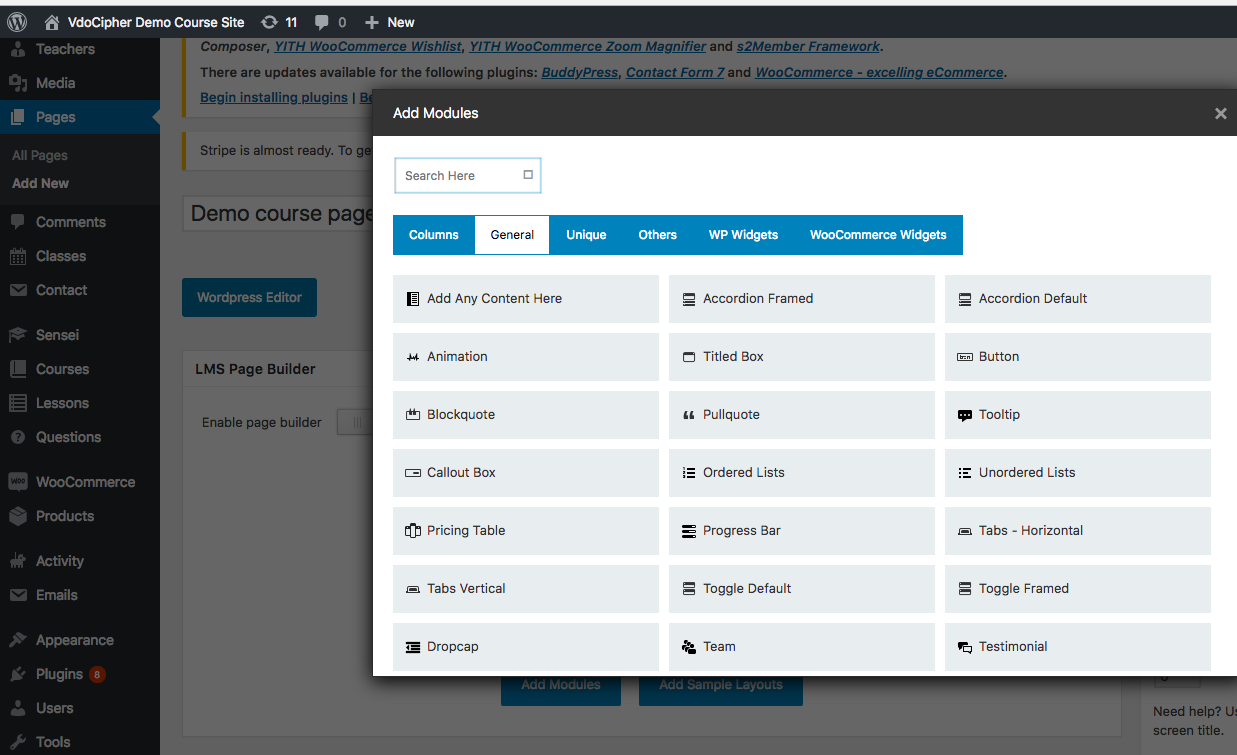
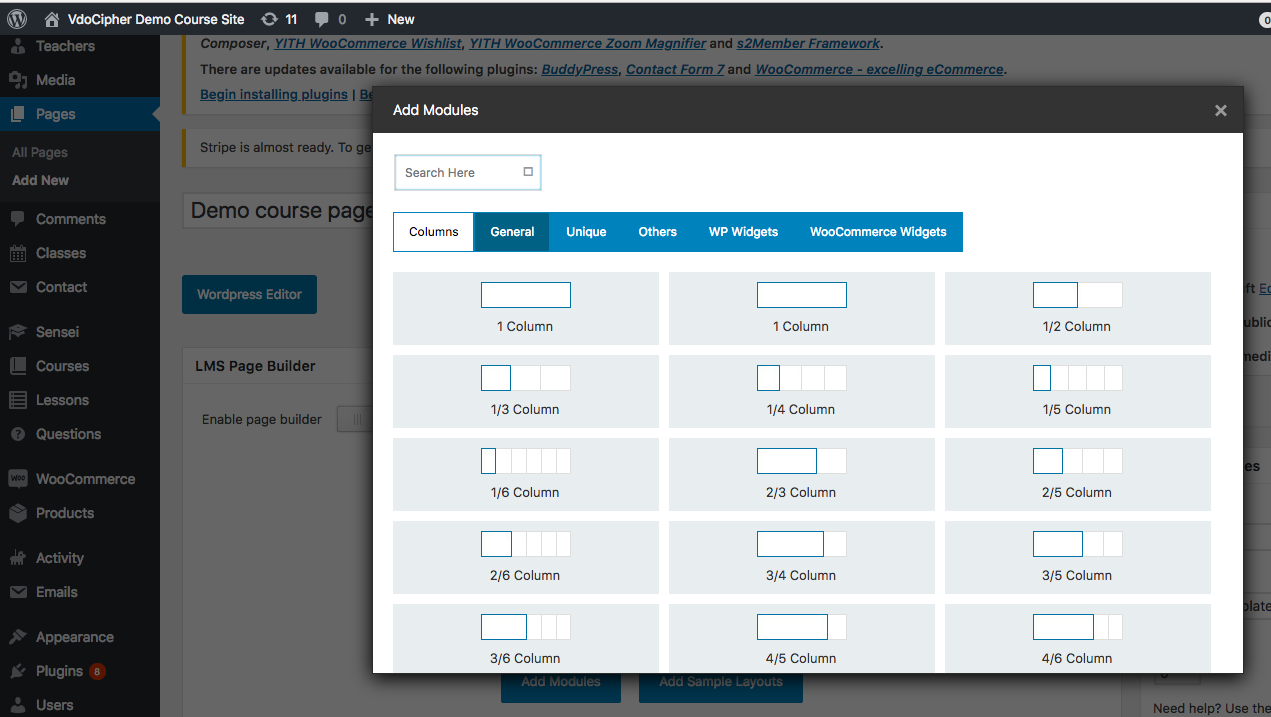
- You can click on add modules and start design & editing content. It is quite intuitive in nature, you should be able to quickly add text and other sections.
- Note – We have seen that sometimes these custom editors change the backend code making some short codes not to work. So , some testing and iteration is to be done for correct working of short code. Short codes can be either put in module section or wordpress editor. They should work in module section most of the times directly, if they dont you can try wordpress editor.
- There are visual and text editing section in editors, for things like short code or any other code, text editor is preferred. For other content like text, images, visual section is good to use.
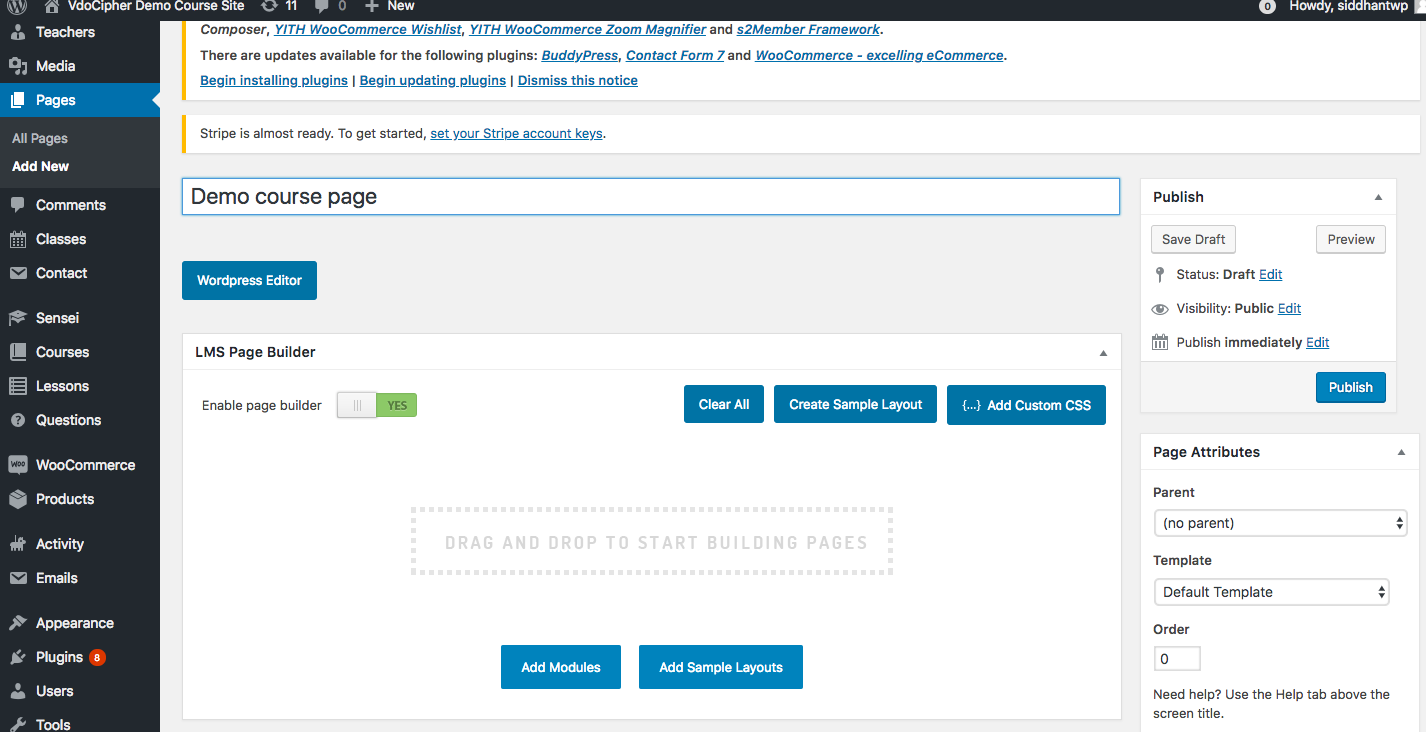
Adding content to page
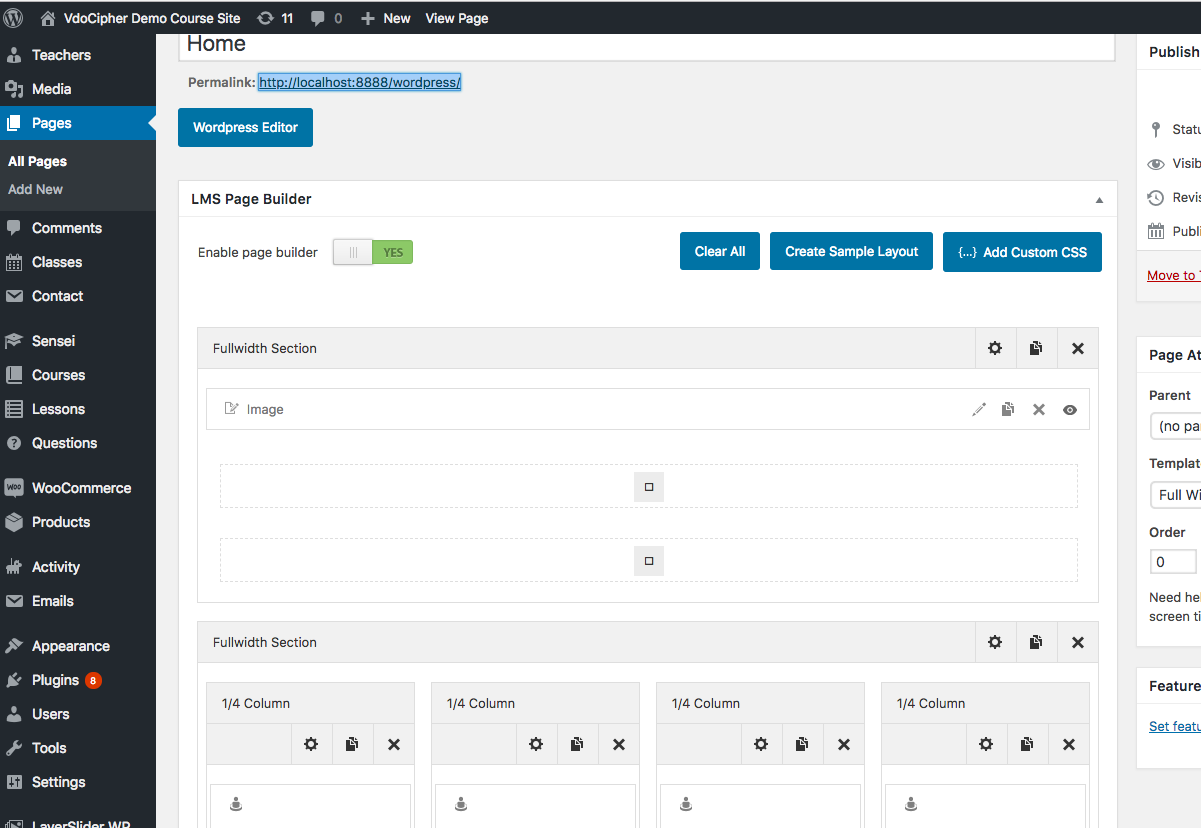
Design element in LMS editor panel
11. Edit Images, Font, Icon in Homepage/other pages
You can go to pages section to see the list of template pages already available. Text addition and editing is easy, you can directly add modules for text. Here , I explain how to identify & edit existing stuff – icon, images, font, text etc.
Search for home in the pages already available, you will be able to find a list of pages. A quick look at them will take you to the main home page. You can see that the page opens in LMS editor and various modules for each of design element like columns, images is already there. We need to edit these template modules according to our needs to quickly launch a beautiful new homepage.
The following support page from theme site explains icon editing in detail. To add custom icons as it says –
- Upload your custom icon in media library.
- You can then upload that icon under the custom icon field.
- You can also use fontawesome icon by putting their appropriate titles.
To add images, go to any module/add module, and add image by using add media option.
12. Buddha Panel for more theme settings
- Go to left widget of appearance.
- Select themes options.
- Choose LMS theme.
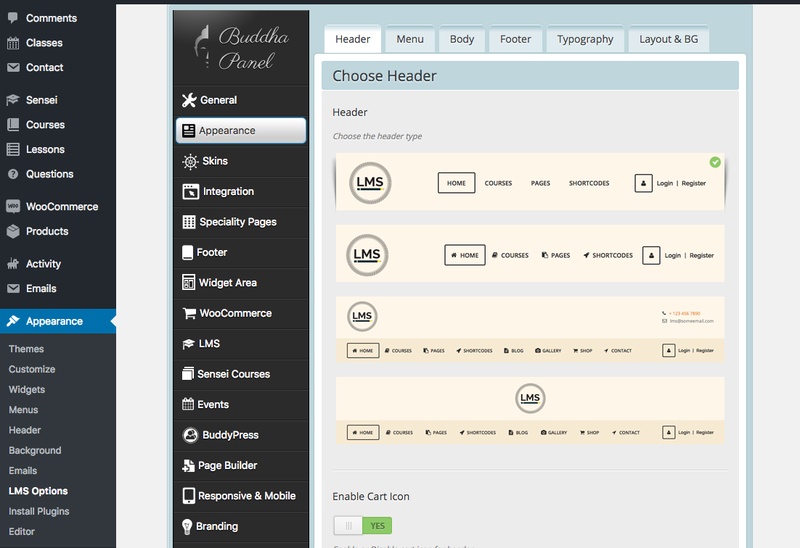
- Select ‘LMS options’, it will open Buddha Panel
- Buddha Panel is a detailed editor for overall site design
- There are lot of options ,main ones being Appearance, Sensei etc. You can go through each of them, and edit it for your convenience.
13. Sensei hierarchy explained
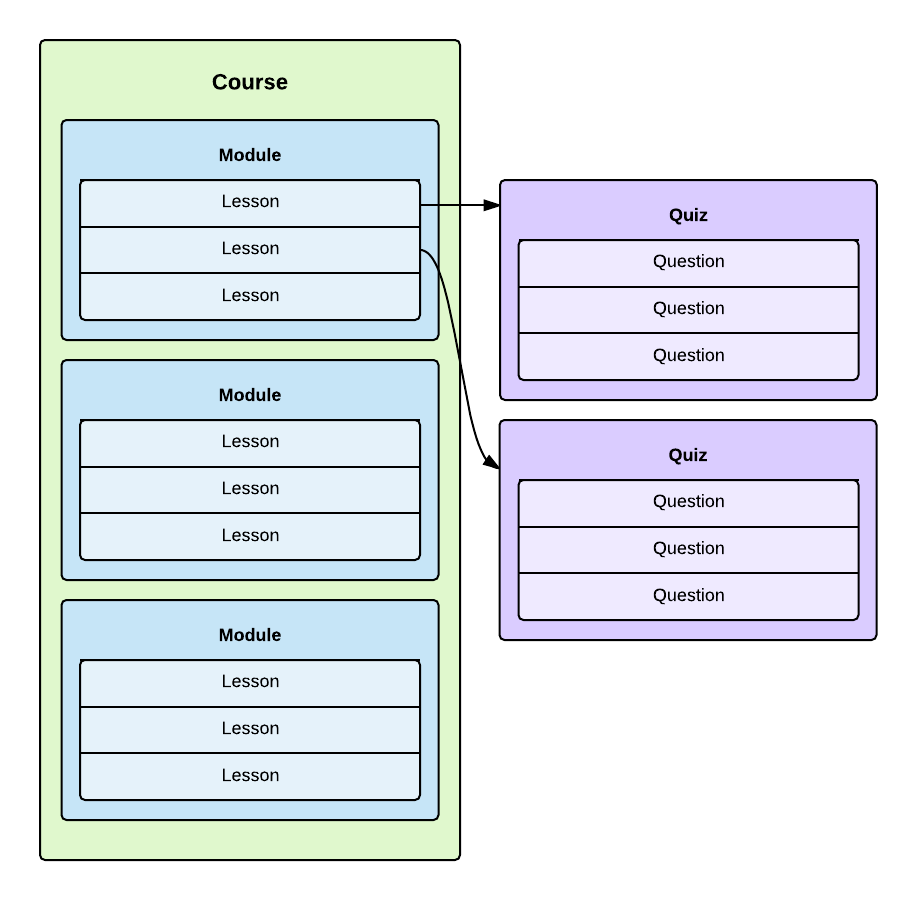
Sensie wordpress course plugin allows for creation of courses, lessons and questions which follow the hierachy as explained in above diagram. More can be read here.
14. How to add courses, classes with Sensei
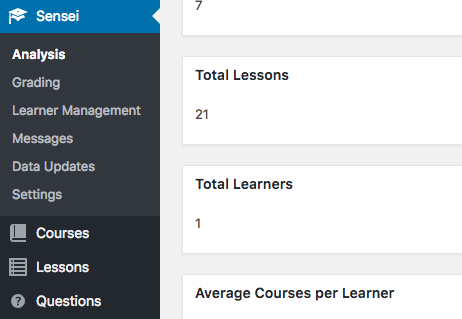
Once Sensei LMS plugin is installed, the left panel has options for Sensei settings, courses and classes. You can click on them to add courses and classes. Details, title , time period all are editable here. Module is a sub section of course which can be used to create lessons.
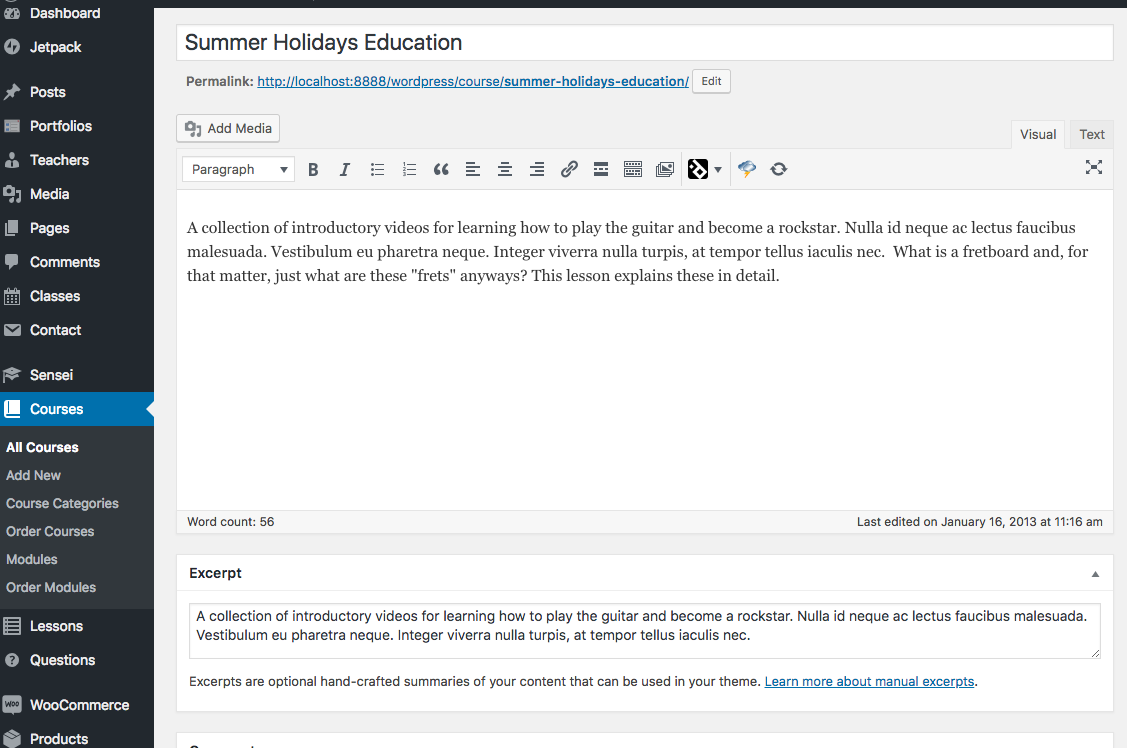
15. Adding videos to Sensei LMS courses
Video streaming is key part of any lecture content. Though there are options to add youtube embed for free hosting, but the videos can be easily downloaded and pirated. VdoCipher plugin enables encrypted and watermark playback to prevent any such downloads or leakages.
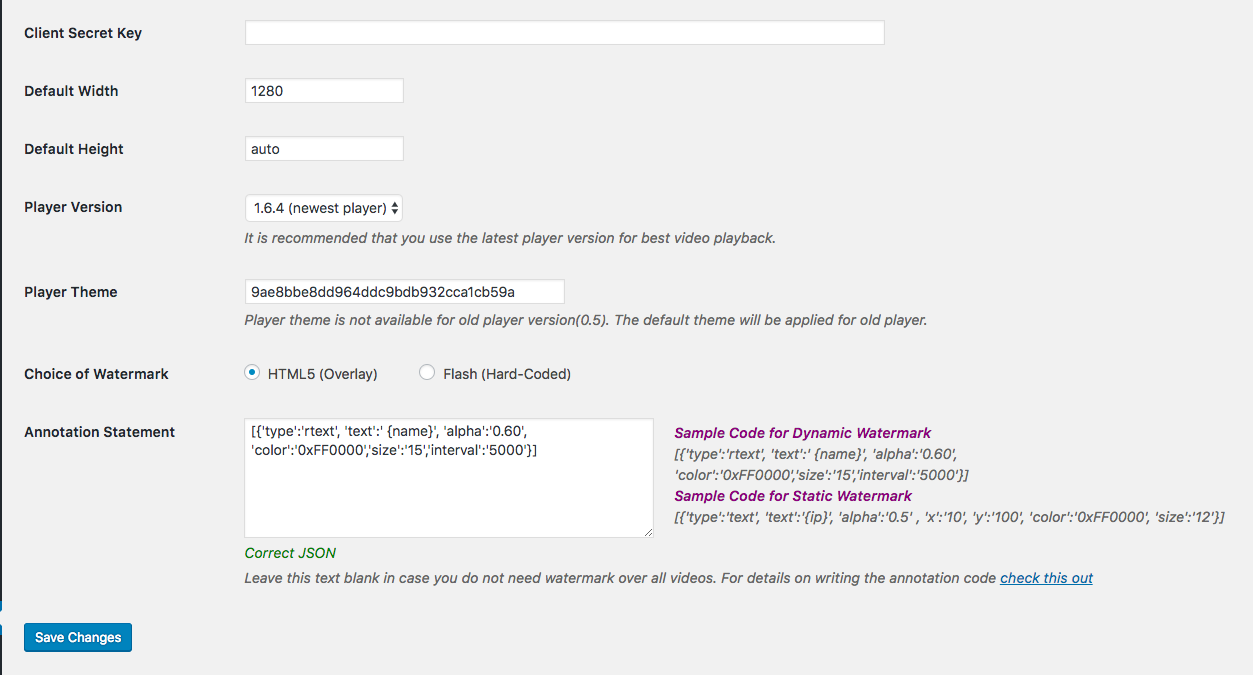
1. Use client secret key from Vdocipher dashboard config. (Free account register available).
2. Put the key in wordpress vdocipher plugin settings page.
3. Use annotation statement for user specific watermark.
4. Use short code like [vdo id="df12xwe321ssd"] in any course or lesson page to embed secure videos. Id here is the video id string for each video available from VdoCipher dashboard.
5. Theme can be customised to allow some buttons or change color of player.
16. Managing Learners, Teachers & Grading
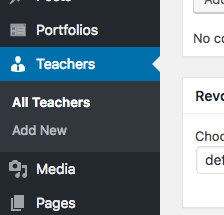
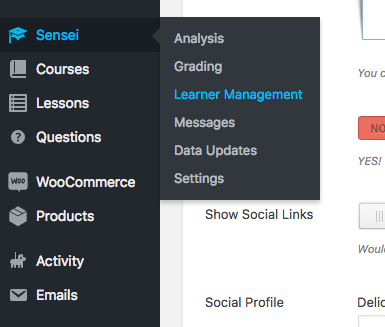
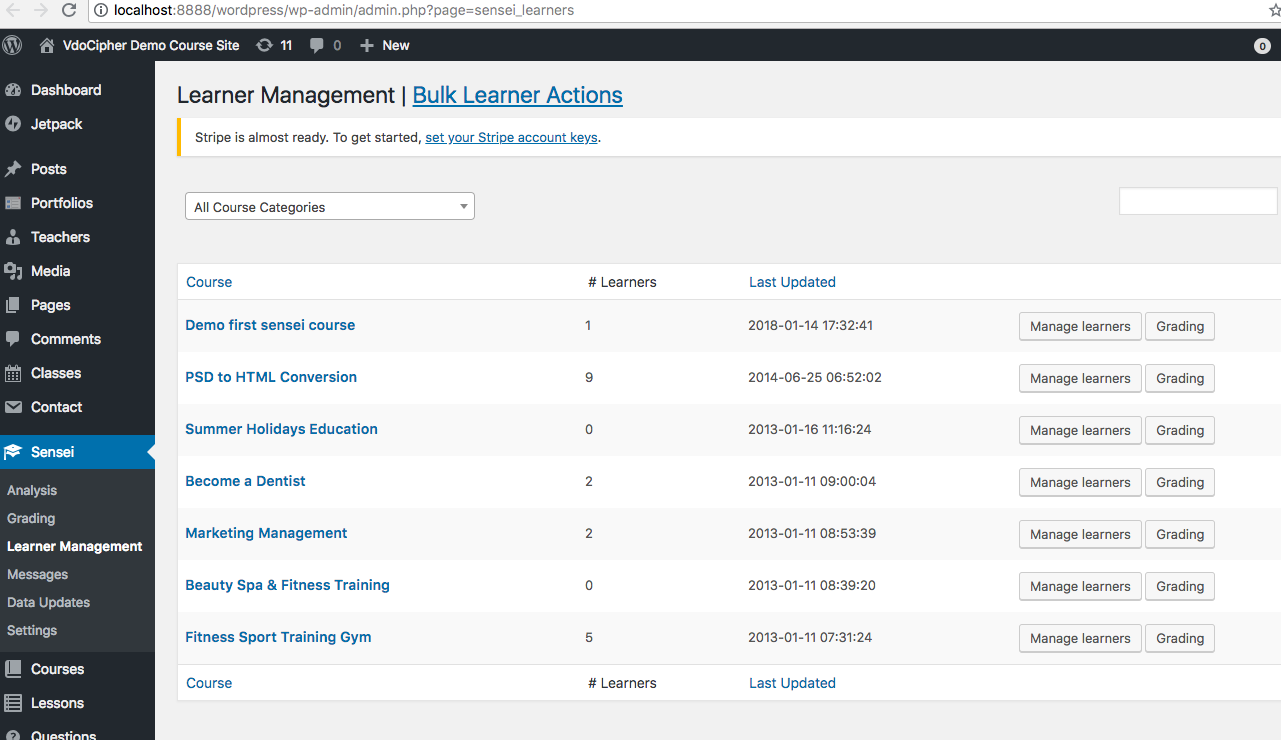
Options to add and edit learners , their grading and teachers is available in left panel. Above screenshots explain how to find and edit them.
17. Sensei with Woo-commerce for pricing & Detailed Sensei settings
> Go to Sensei panel on left
> select settings option
> Select Woo-commerce Tab
> Select ‘Use WooCommerce to sell Courses by linking a Product to a Course.’
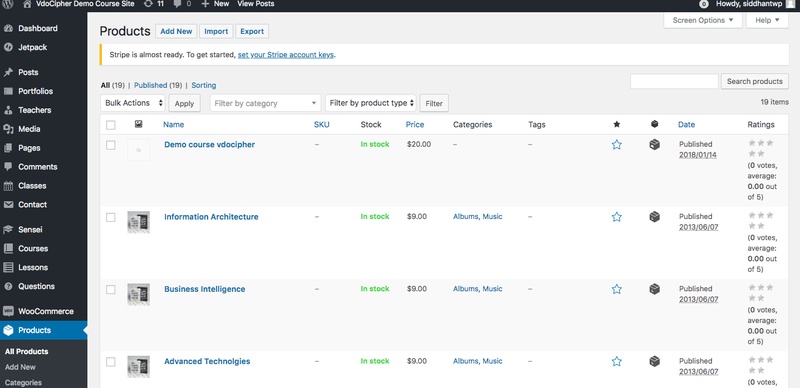
> Go to products section to set pricing and other selling parameters
> Add product details, then select the checkbox for the Virtual product to remove shipping information from checkout and Save.
> Go to Lessons
> All Courses and Edit the course you want to attach to your new product.
> Go to: WooCommerce Product in the right sidebar to attach the product.
> Select Update to save.
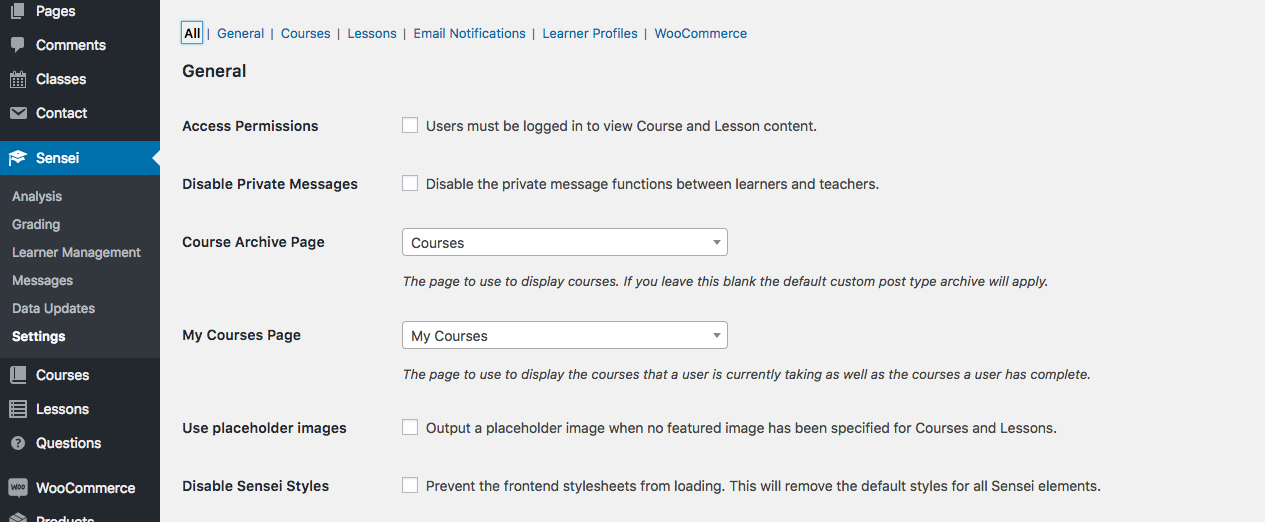
This would create your course as a product which can be then put a price and sold through woo-commerce. Screenshots for both the steps are included below. More details can be found in support page.
18. Integrating payment gateway like Paypal , Stripe
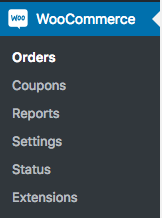
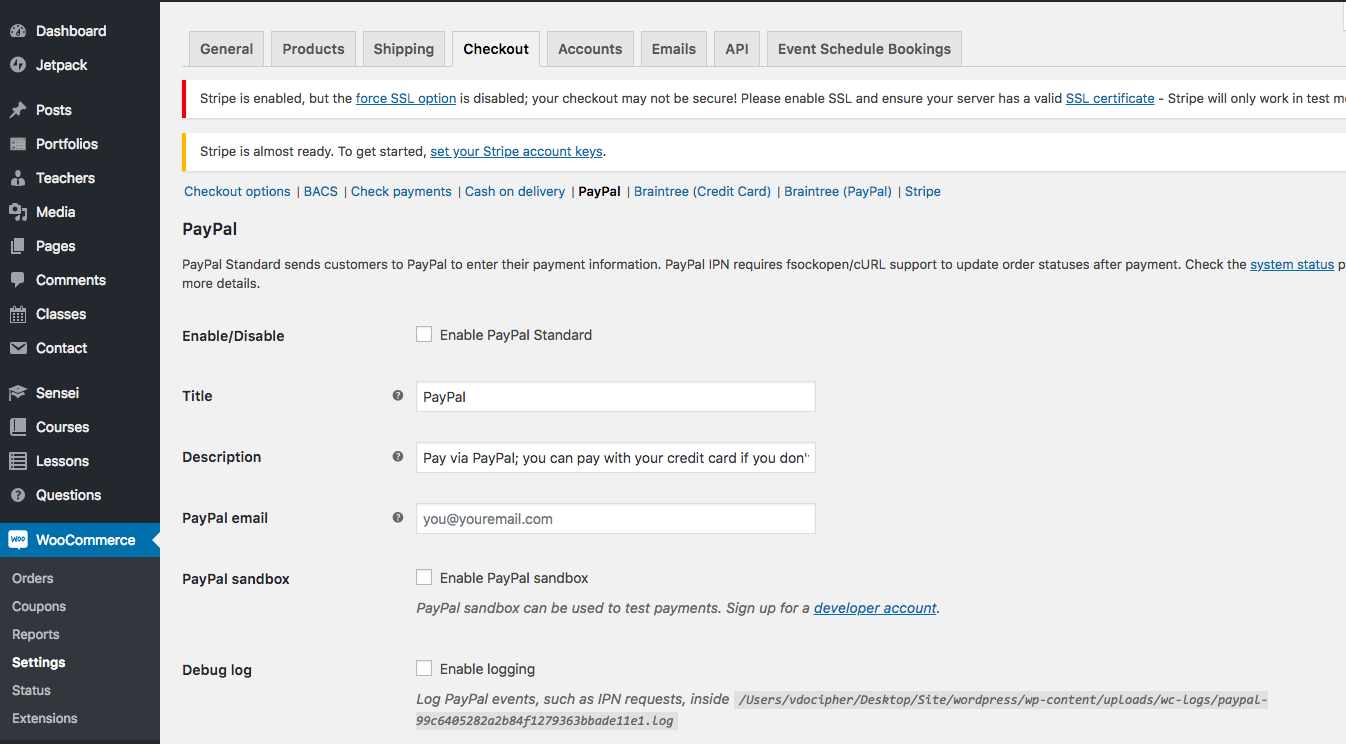
- Go to Woocommerce option in left panel.
- Select Settings option. Multiple top tab options are visible.
- Select Checkout option. It enlists various options for payment gateway
- You can choose amongst what suits you, paypal & stripe the two most common international payment gateway are also there. Screenshot is attached for this.
19. How it looks for a student ?
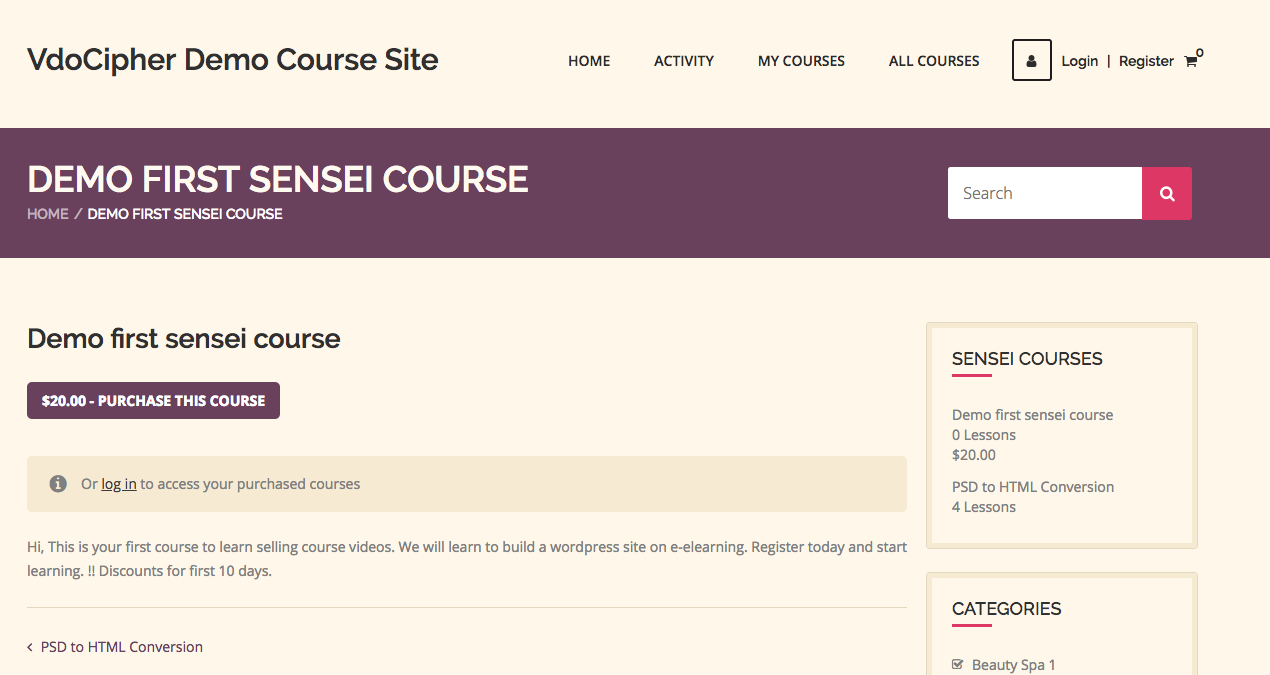
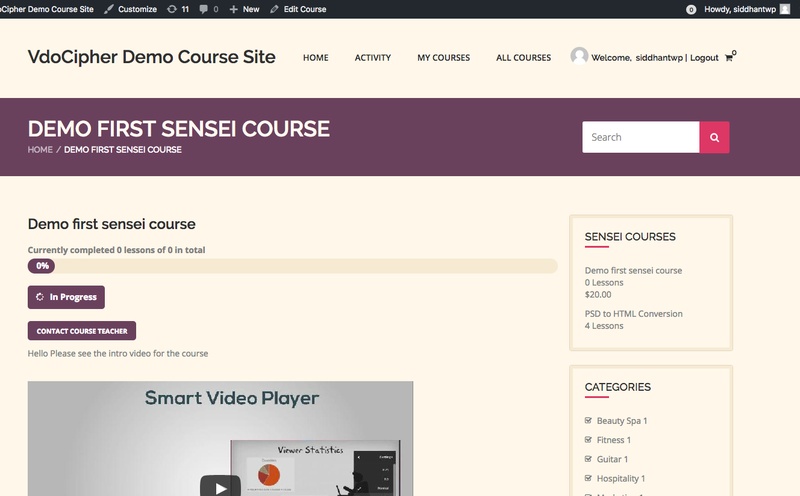
You can go to a course and open it from an incognito window or after logging out of wp. You should be able to see a student perspective of course/lesson.
20. Support Links
21. VdoCipher Free Trial
A free full version trial of Vdocipher upload and embed system to embed videos on WordPress via a plugin is available. Please register here for free 30 day trial
A demo video on how VdoCipher helps e-learning content creators to maximise their revenue is shown below.
Supercharge Your Business with Videos
At VdoCipher we maintain the strongest content protection for videos. We also deliver the best viewer experience with brand friendly customisations. We'd love to hear from you, and help boost your video streaming business.

 Step2
Step2 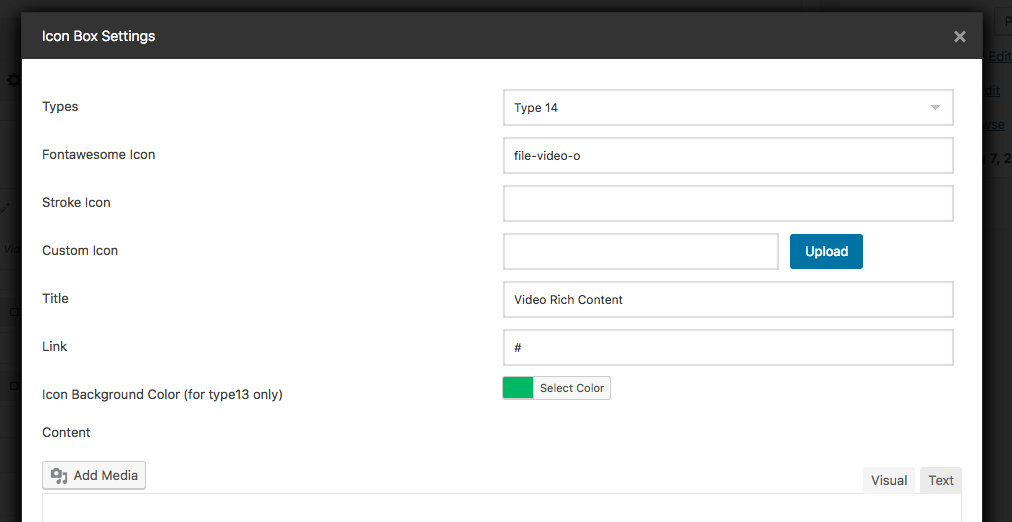

Leave a Reply